

If a fin slides into your board, does that mean it's the right fin? That's the gap behind plenty of avoidable buying mistakes. Physical fit isn't the same as an approved connection, especially when you're sorting out a second-hand board with unidentified plugs and a bag of mixed fins.
When shopping for surfboard fins, FCS branding alone doesn't settle compatibility. Start underneath the board, identify the box system, then choose the set, size and construction. That order matters more than the colour, signature model or promise of extra drive.
Identify Your FCS Fin System Before You Buy
FCS, FCS II and Futures at a glance
| System | Fin base and fixing | Box or plug | Fitting and interchange |
|---|---|---|---|
| FCS I (original) | Two tabs secured with screws | Original FCS plugs | Needs screws and a fin key; FCS I fins fit FCS II boxes with screws +/- an adaptor kit |
| FCS II | Two tabs that snap in by hand | FCS II boxes | Tool-free for most changes; accepts original dual-tab fins |
| Futures | Single tab | Futures boxes | Different system; not interchangeable with FCS |
The box installed in the board determines which fins are designed to fit. A deck logo, board age or the fins supplied by a previous owner won't confirm the system. Replacement plugs can make older boards harder to identify, especially from a general photograph.
Similar-looking FCS generations aren't necessarily interchangeable. Check the fin base and the box before choosing a set.
Check compatibility in the right direction
Original dual-tab FCS fins can be used in FCS II boxes with the appropriate securing arrangement. Their tabs entering the box doesn't mean they gain FCS II's snap-in retention. Check which screws and compatibility hardware the specific combination requires.
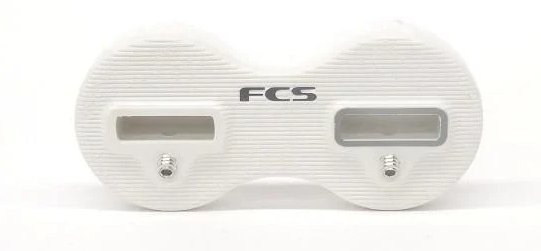
FCS II fins aren't a default replacement for original FCS plugs. Treat claims about extra hardware as specific to the fin and plug involved, and confirm compatibility rather than forcing the parts together.
The FCS II fins guide explains the newer system alongside older dual-tab equipment.
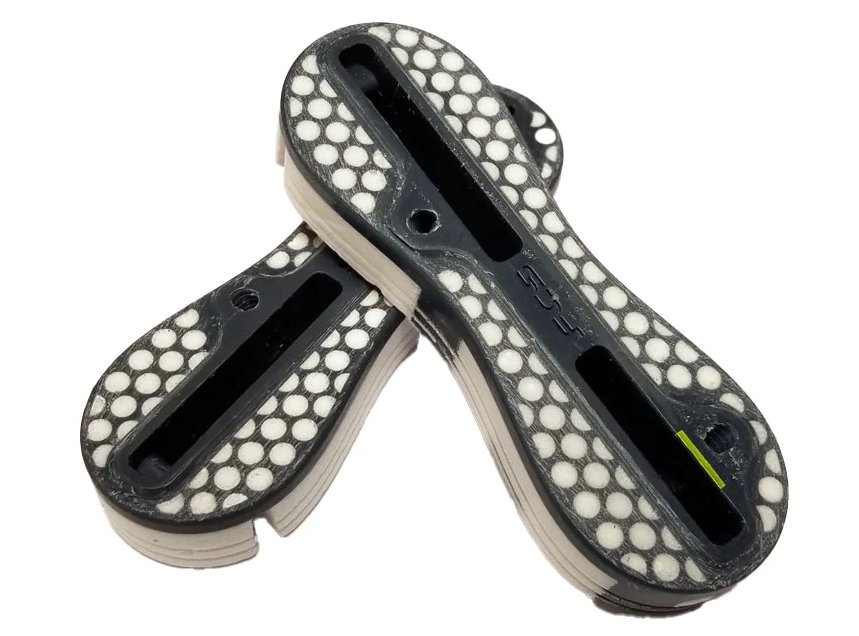
Buying rule: A fin that seats has passed a shape check. Confirm the manufacturer-approved system and retention method before using it.
Request photographs that answer the question
Ask a second-hand seller for close-ups of the plugs with the fins removed. A full-board photograph won't show enough detail.
- Count the tabs: Check the fin base. A single-tab Futures fin isn't an FCS substitute.
- Look for screw holes: Check where screws engage the tabs. Screw holes alone don't identify the generation.
- Check plug shape and depth: Photograph the openings from above and at an angle, including any moulded identification.
If the plugs remain unidentified, hold off on buying fins. Confirming the board's hardware first avoids paying for a set that only appears to fit.
Fin Set Formats and What Each One Suits
FCS II fin sets and NZ prices
Confirm the board's fin system first, then choose a set that matches its layout. The Surf Industries NZ fin collection lists these formats and reference prices. Check the live product page for the current price before buying.
| Set | Fins in set | Board setup | NZ price |
|---|---|---|---|
| Performer tri-fin set | 3 | Thruster | NZ $100-$200 depending on construction |
| Modern Keel twin-fin set | 2 | Twin | NZ$189.95 |
| Connect Side Byte set | 2 | Two-fin setup | $70-130 depending on construction |
| Performer quad rear set | Rear pair | Quad rear fins | as above |
Buy for the configuration, not just the product name. A quad rear set supplies the rear pair, not the front fins. The word “set” doesn't guarantee a complete outfit for your board.
Prices aren't a performance ranking. A rear pair costs less than a complete thruster set partly because the packages contain different fins. Compare like with like when weighing value.
Match the package to the board's intended layout
A thruster uses two side fins and a centre fin. A Performer tri-fin set suits that layout when its system and size match the board. The guide to understanding FCS II thruster fins explains how to distinguish template choice from set compatibility.
A twin relies on two primary fins, without a conventional thruster centre fin. Modern Keel twins suit boards designed for that style of fin. Removing the centre fin from an ordinary thruster doesn't make its side fins a suitable twin set.
A quad uses suitable front and rear fins. Performer quad rears make sense if you already have compatible front fins and want to complete the layout. They won't replace missing front fins.
Side bites aren't primary twin fins
The Connect Side Byte package contains two fins, but that doesn't make it equivalent to the Modern Keel twin set. Side bites support a suitable board arrangement, often alongside a separate centre fin eg in a ,longboard or midlength. Check the intended application rather than treating paired packages as interchangeable.
Shop midlength surfboards online
Before ordering, establish:
- What you already own: Separate usable front fins from rear fins, centre fins and damaged spares.
- What the board supports: Follow its intended layout, not every available opening.
- What the package includes: Confirm whether it's a complete configuration or an add-on pair.
For a conventional FCS II thruster shortboard needing a complete replacement, start with a correctly sized Performer tri-fin set. A quad rear package or side bites won't provide the full thruster setup.
Choosing Fin Size, Flex and Setup for NZ Breaks
More fin can deliver more control, but you'll work harder to redirect it. A full-scale computational-fluid-dynamics study of a three-fin shortboard found increased lift with fins, alongside drag of approximately 4.8 N versus 4.5 N without fins at 12°, and 6.5 N versus 5.9 N at 15°. The model's lift-to-drag ratio peaked around 7–9°.
Those are comparative engineering results, not predictions for a session at Wainui or Raglan. They support the practical trade-off between directional control and resistance, but they don't identify a universally fastest template.
Check the base connection before judging how a different template feels.
Choose area before chasing construction
Start with the fin maker's rider-weight guidance, then account for board volume, tail shape and how hard you push. Larger templates generally add hold and stability; smaller templates reduce resistance and make the tail easier to release. Neither outcome is automatically better.
A heavier rider who keeps overpowering the tail may need more fin area. A lighter rider struggling to redirect an otherwise suitable board may be fighting excessive area. Don't buy the largest option because you want to progress into stronger surf.
Use our surfboard volume calculator to put the board in context, rather than choosing fins independently of the equipment beneath your feet.
Match flex to the pressure you apply
A peer-reviewed review of surfboard-fin research describes how controlled rear-fin flex can improve lift and drag characteristics, while also highlighting inconsistent testing methods. In practical terms, moderate flex can soften loading through an imperfect turn, whereas excessive flex can delay response when you want immediate drive.
Heavier or stronger surfers generally benefit from firmer base support and stiffer construction. Lighter riders may find moderate flex easier to load. Compare changes on the same board and within the same box system, otherwise you won't know which change caused the different feel.
Use the video alongside your template comparison, rather than as a substitute for checking compatibility.
Choose for the session, not the postcode
- Gisborne and East Coast beach breaks: A thruster is a sensible starting point when punchy sections demand predictable hold. Size it for the rider and actual wave power.
- Softer Raglan-style waves: A smaller, looser option may help an over-finned board turn more freely. Don't shrink the fins until the tail loses the support you need.
- Powerful reefs and points: Favour dependable base support and a construction you can load confidently. Use screw retention where the manufacturer permits or requires it.
For trips from Auckland, Taranaki or the South Island, pack compatible screws and a fin key before leaving. We sell Endorfins, FCS and Futures Fins, alongside surf hardware including bodyboard fins, boardbags, leashes, grips, paddles, roof racks, wax and earplugs, so consider the complete travel kit rather than fins in isolation.
How to Fit and Care for FCS Fins
FCS II snaps in by hand; original FCS requires screws and a fin key. They also recommend carrying a key and screws for larger fins or heavier surf. Tool-free convenience doesn't mean hardware is never useful.
Prepare a stable, padded surface before fitting anything. Keep the board supported so you're not pushing against an unsupported tail, and keep your hands clear of the fin's sharp trailing edge.
Use this fitting-and-care sequence as a quick reference.
Fit clean components without forcing them
- Clean the fin box and tabs. Brush out sand with a soft brush, rinse away loose grit and remove wax with a plastic tool rather than a metal blade. Wax hidden at the bottom can stop the base seating even when the opening looks clean.
- Match each fin to its intended position. Check the system, generation and side or centre designation before inserting it. A base that looks close enough isn't a reason to apply more force, and a side fin shouldn't be swapped into the centre position.
- Seat FCS II fins using the correct engagement sequence. Engage the front tab, then press the rear of the base down until the retention mechanism locks, following the instructions for that model. Pull gently to confirm retention rather than trusting the sound or feel of insertion alone.
- Secure original FCS tabs with the fin key. Seat the fin squarely, engage the screws and tighten until snug without leaning hard on the key. Overtightening can damage threads or tabs; leaving a screw barely engaged can allow movement.
- Check the finished connection before paddling out. Look along the base for uneven seating and gently test for movement, then check again after the first few waves. If a fin loosens, return to shore rather than continuing to load a suspect connection.
- Rinse and dry after the session. Use fresh water to flush salt and grit from accessible recesses, then let the equipment dry before storage. Don't pack a sandy, wet assembly away and expect the next fitting to be clean.
A secure fin should be the result of clean seating and the correct retention method, not extra force on the key.
Stop when the mechanism resists
If a fin won't engage or release normally, inspect it instead of levering against the board. Remove debris, check for damaged tabs and consult the model's fitting instructions before trying again.
For transport, remove fins when appropriate for the boardbag and journey. Keep the matching hardware together in a small pouch, so a missing screw doesn't become a beachside compatibility experiment.
Fixing Fit Problems on Used and Mixed Boards
A loose fin in a second-hand board isn't automatically a bad fin. Grit, worn tabs, damaged retention hardware and unidentified replacement plugs can produce similar symptoms. Begin by checking whether the fin moves inside the box or the whole box moves in the board.
Fin fit symptoms, causes and fixes
| Symptom | Likely cause | Fix |
|---|---|---|
| Fin wobbles or feels loose | Worn tabs or grit in the box | Clean the box, check tabs for wear, replace worn fins |
| Fin will not seat | Wrong system or debris in the box | Confirm FCS or FCS II, clear the box, check tab alignment |
| Fin pops out mid-session | Insufficient locking or worn base | Re-seat and check the lock, replace the base if worn |
| Fin sits proud or too deep | Depth mismatch between fin and box | Check the box depth and use the correct template |
These are starting diagnoses, not guarantees. If the fin's base is integral to the fin, replacing a worn base means replacing the fin, not attempting to rebuild its locking surfaces with glue.
Separate compatibility faults from damage
A guide distinguishes traditional screw-secured FCS equipment from tool-less FCS II and describes compatibility as directional rather than universal. That matters when a seller supplies an older board with newer fins: the package itself isn't proof that the combination is approved.
Check suspicious equipment with the fins removed. Look for cracked tabs, rounded screw-contact areas, damaged threads and movement around the plug perimeter. A screw that turns without tightening needs attention, not another hard twist.
Stop-and-identify rule: If you can't identify the box, don't paddle out with a fin held by improvised pressure or an uncertain snap fit.
Don't turn a retention problem into a repair
Avoid tape shims, aggressive sanding or longer screws chosen to reach further. Those changes can disguise the wrong base geometry or transfer force somewhere the plug wasn't designed to take it.
If the plug moves, cracks surround it or the laminate has lifted, use our surfboard fin box repair guide to understand the repair route. We offer surfboard repair services, so a damaged box doesn't have to become a home-made hardware fix.
For unfamiliar boards or powerful surf, a correctly approved screw-secured connection may be preferable to relying on tool-less convenience. Carry the key, but remember that screws don't make an incompatible fin compatible.
Shop FCS Fins and Confirm Before You Buy
Browse the surfboard fin collection with the board's system already identified, then narrow the options to the relevant FCS or FCS II sets. Search by base compatibility and configuration first, then compare templates within that group.
The Performer tri-fin, Modern Keel twin and Performer quad rear packages answer different buying needs. Use the reference prices alongside their package contents, not as quotes for every retailer or construction. For the Connect Side Byte set, check its product page for the current price and confirm that the supporting-fin application suits your board.
Make checkout a compatibility check
Before paying, work through the purchase in this order:
- Identify the installed system. Use the markings and clear photographs of the actual boxes, not the seller's shorthand description of the board.
- Match the intended configuration. Count the available positions and establish which should be occupied for your chosen setup. An optional centre box can remain empty in a quad configuration; an incomplete quad package is a different matter.
- Choose size and flex deliberately. Start with rider weight, then account for wave power and the response you want. Change a clear variable rather than buying a radically different size and construction together.
- Check the retention hardware. Add the correct fin key and compatible screws where required, particularly for larger fins, heavier surf or approved mixed-generation combinations. Don't assume a tool-free label removes every hardware consideration.
Keep the product description with the decision
Save the exact model, size, construction and compatibility information when ordering. That makes it easier to check the delivered set and replace a missing fin later without guessing from its colour.
If you're choosing between an affordable correct set and a premium uncertain fit, I'd buy the correct set. A dependable connection and an appropriate template are useful from the first session; an expensive fin in the wrong box isn't an upgrade.
Blitz Surf Shop offers FCS fins alongside Endorfins and Futures Fins, plus the surf hardware needed to prepare your board for the next session. Visit Blitz Surf Shop with your board's box details and intended setup, and choose a compatible set before chasing a different feel.


