

Only 54% of surveyed people said they always used safety equipment such as leg ropes, surf fins, helmets or buoyancy aids, according to Surf Life Saving New Zealand's national beach and coastal safety report. That's a useful starting point when you're comparing a surf leash for sale: equipment only helps when you choose it for the conditions, maintain it and use it.
The best buying decision is matching a cord to your board's length. Start with the waves you ride, the load your board can put through the leash and the consequences of a failure. Then consider fit, hardware and what you'll do when the leash reaches the end of its useful life.
Surf Leash Types and Where Each One Fits
A straight ankle leash is the default for everyday NZ beach-break surfing. It keeps the setup straightforward, avoids unnecessary bulk and suits most beginners when the cord and cuff are appropriate for their board. But attachment position alone doesn't tell you how strong a leash is.
A calf cuff changes where the leash pulls and where the cord sits around your legs. A thicker cord changes the strength-and-drag trade-off. Those are separate choices, so don't assume that moving the cuff higher automatically upgrades the whole leash.
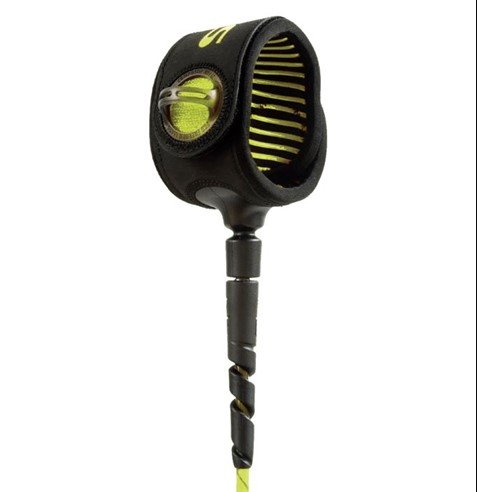
Surf leash types by use and conditions
| Leash type | Best for | Attachment | Key trade-off |
|---|---|---|---|
| Straight ankle leash | Everyday beach breaks and small to large surf | Rider's ankle | Straightforward everyday option; suits most surfers |
| Calf leash | Regular surf for longboarders wanting to do footwork, cross-stepping etc | Rider's calf | Higher attachment can suit footwork; cuff position alone doesn't guarantee greater strength |
| Competition | People wanting less drag in smaller waves | Ankle | Thinner cord but same set up as regular leashes |
| Big-wave leash | Heavy, powerful surf | Ankle | Heavy-duty cord and cuff; reserve for committed heavy-surf use. Also people with larger surfcraft often use these as stronger options in normal surf |
| Quick-release leash | Most have a release system but higher priced ones have better | All attachments | Loop to rip leash off your leg if in trouble eg tangled around coral reef or a rock |
Competition and heavy-duty aren't interchangeable descriptions. A competition leash usually prioritises low drag. A thicker regular or heavy-duty leash prioritises retaining the board under greater loading, at the cost of more material moving through the water.
Read the product's intended-use description rather than buying on the name. A slim cuff and minimal cord may feel unobtrusive during turns, but that isn't a reason to use them in powerful exposed surf.
When the environment changes the choice
Maritime NZ's SUP safety guide specifies a straight ankle or calf leash for surf conditions, but a quick-release leash operable from above the waist for strong currents, including rivers and harbour mouths. It explicitly warns against ankle- or calf-attached leashes there because a snagged leash may be impossible to release under tension.
That guidance is particularly important for paddleboarders who move between surf and inland or harbour environments. Don't treat a familiar ankle cuff as suitable everywhere merely because it has a pull tab. Practise operating the appropriate release in controlled conditions before relying on it.
Bodyboarders should also shop for their own riding setup rather than borrowing a surfboard recommendation. The bodyboard and accessories guide explains how leashes fit alongside fins and fin savers.
Before buying, answer these questions:
- Which waves do you surf? Sheltered beach-break sessions and exposed-coast sets call for different construction.
- How often do you surf? Frequent use makes accessible inspection points and durable fittings more valuable.
- Do you paddle near rivers or harbour mouths? If so, address current and snagging hazards before choosing an attachment system.
Leash Length and Cord Thickness by Board Type
Choose a leash in a range around as long as your board, especially for nose riding on a longboard, with a small allowance rather than a large surplus. As an example boards around 6-7' would generally use a 6' leash but might go to 7' in bigger waves. 7'-8' board would generally use around a 7' leash etc. That allowance can help create separation after a fall, but it can't guarantee the board won't strike you. Excess length adds cord around your feet and increases the distance the board can travel and recoil.
Check your actual board dimensions before shopping. A shortboard, fish or midlength label doesn't establish its length, and the same leash won't necessarily suit every board within that category.
Use this visual as a starting point, then check the individual product's intended conditions.
7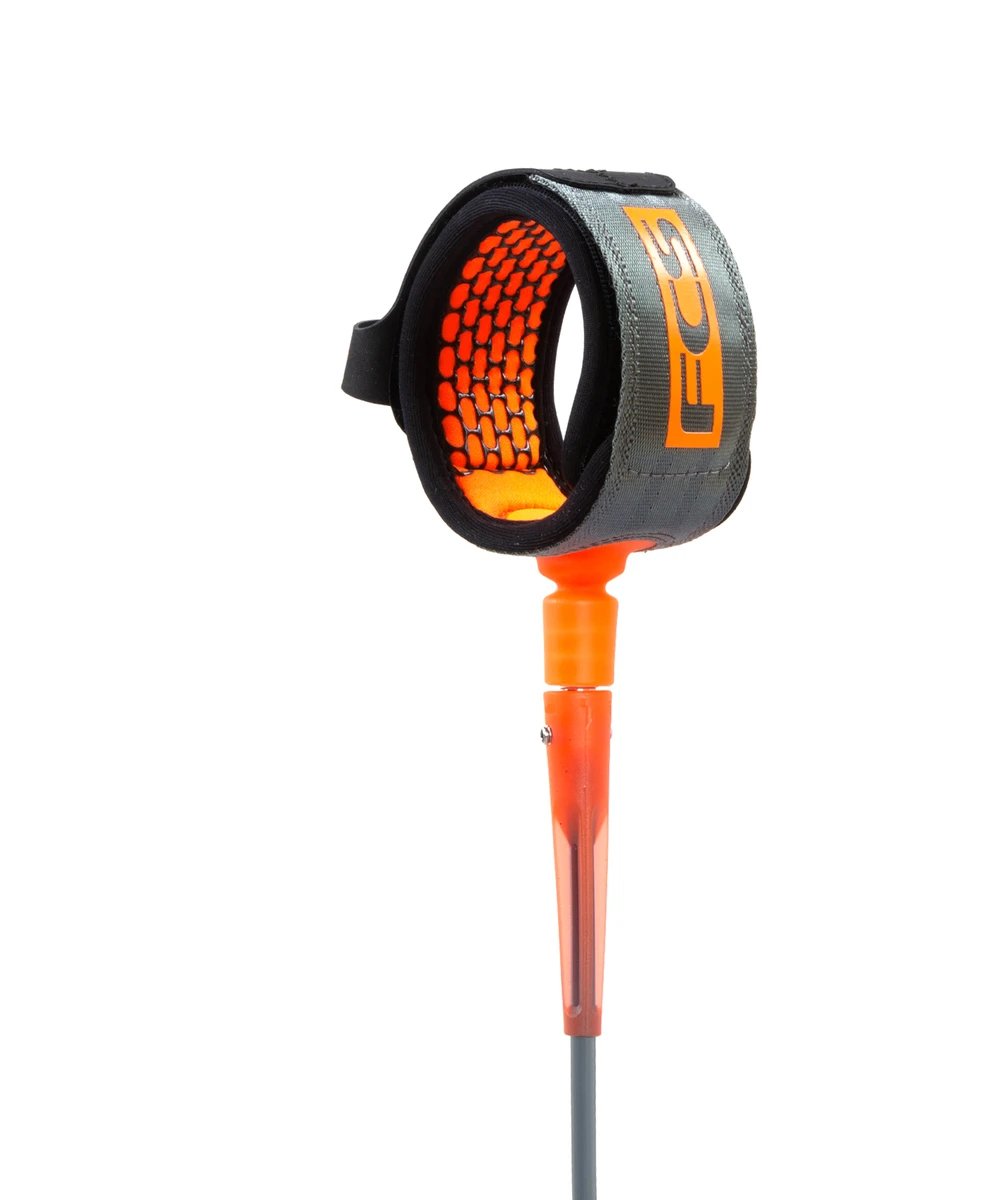
Leash length and cord thickness by board type
These are illustrative shopping configurations, not universal specifications or manufacturer load ratings. Each assumes a board no longer than the proposed leash.
| Board type | Leash length | Cord thickness | Sizing note |
|---|---|---|---|
| Shortboard or fish | For example, 6 ft (1.8 m) | For example, 5.5–7 mm | Consider 7 ft for a longer board or bigger waves |
| Midlength | For example, 7 ft (2.1 m) | 7 mm+ | Match range from your board length plus a small allowance |
| Longboard | For example, 9 ft (2.7 m) | For example, 7–8 mm | Adequate length accommodates the board and nose riding |
| Stand-up paddleboard | For example, 10 ft (3 m) | For example, 7-9 mm | Choose construction rated for the board; use a straight leash for surf |
| Big-wave gun | For example, 7–9 ft | For example, 7–9 mm | Match the gun and specialist use; thickness alone isn't a heavy-surf rating |
Say you ride a 6'2 thruster in bigger Gisborne swells. A 6 ft leash is a sensible configuration for most, maybe 7' if you are charging, to assess because it clears the board-length requirement without adding a large surplus. You'd still need a cord, cuff and connection system designed for strength, not merely a longer version of a lightweight competition leash.
If you're unsure which board category describes your setup, use the surfboard length guide alongside the dimensions printed on your board.
Read period as well as wave height
Longer-period swell can deliver more powerful sets and greater peak loading than weak wind swell. As an illustration of local conditions, MetService's forecast for The Spit can show approximately 2.0 m swell with a 14-second period. Those forecast values aren't fixed conditions, so check the current report before choosing your session.
Fit the cuff snugly without restricting circulation. With the board flipped for an attachment check, make sure the rail saver reaches across the rail and the thin string stays clear of that edge. Once fitted to you, arrange the cord behind your stance rather than leaving it wrapped around or dragging against your leg.
Leash Hardware and Materials to Check
Start at the rail saver, because a strong cord connected badly can still damage the board or let it go. The rail saver should span the tail's rail so the narrow leash string doesn't bear directly against the board. Check the assembled connection, not just the loose leash in its packaging.
The component layout below helps identify the parts you'll handle during a shop inspection.
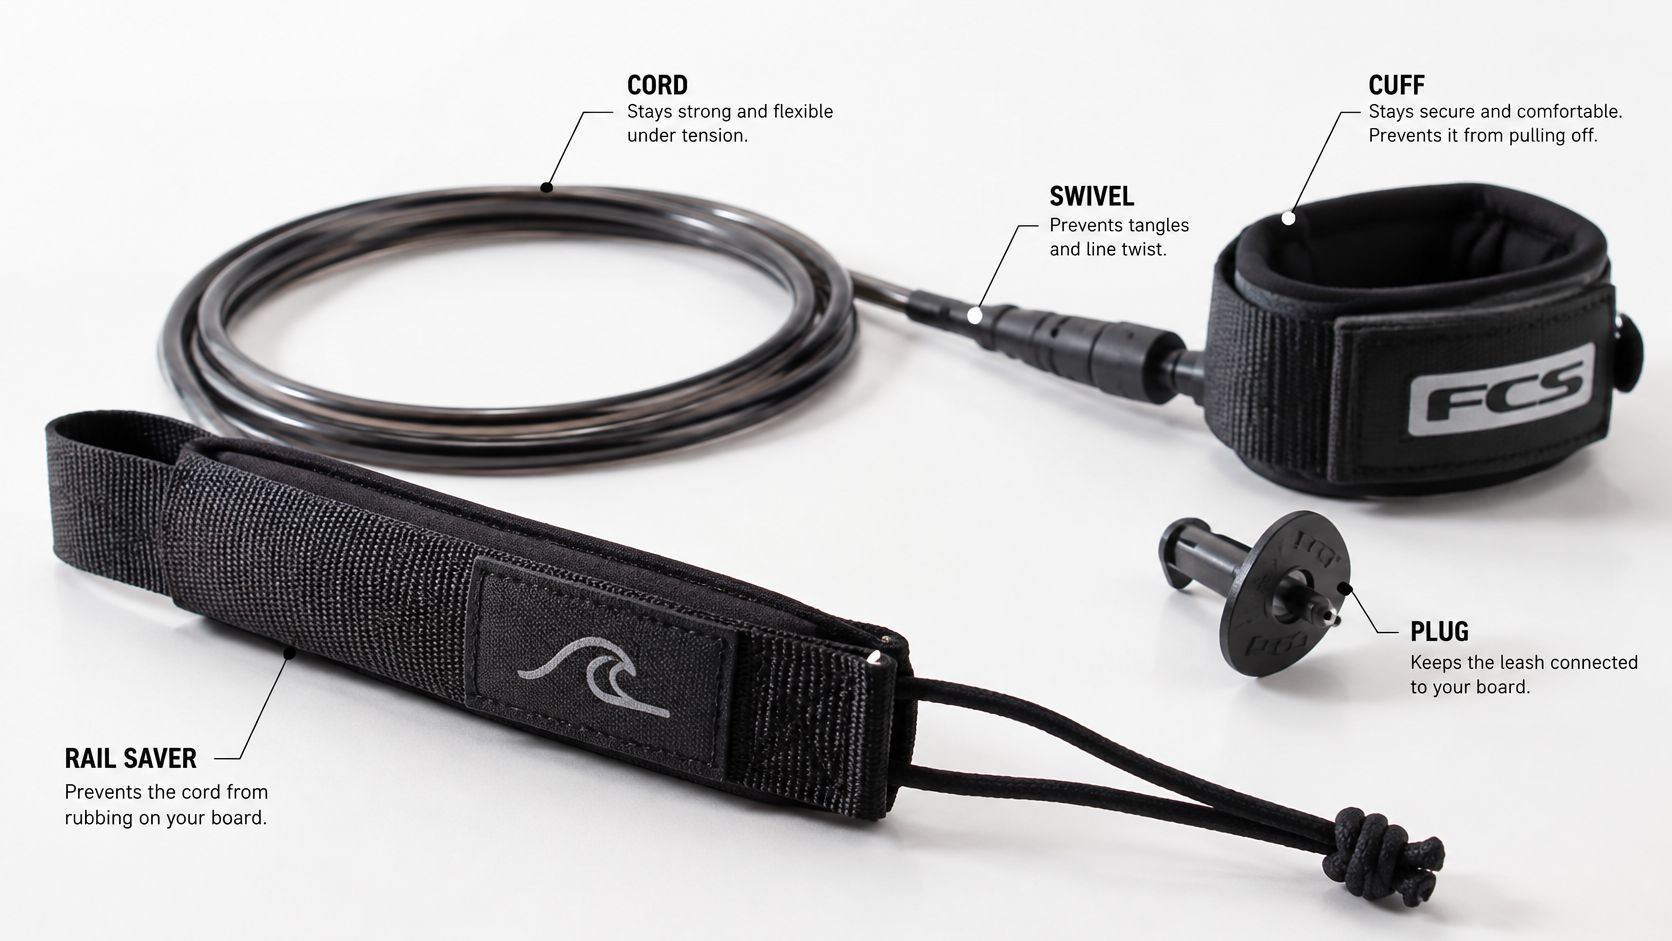
Check the whole connection path
A rail saver is commonly a broad webbing strap, sometimes with padding, rather than a rubber or foam sleeve. Whatever its construction, it must put the broad protective section against the rail. A long string loop that reaches beyond the tail defeats that protection.
The swivel allows the cord to rotate instead of winding into twists. A cuff-end swivel is useful on a straightforward setup; a board-end swivel can also help manage rotation, particularly with longer cords. More hardware adds weight, cost and joints to inspect, so buy functioning components rather than a feature count.
Say a surfer paddles back through shorebreak with the cord tangled around a foot. They stop paddling to free it and lose ground against the current. A freely turning swivel and sensible cord management help avoid that distraction, although no swivel makes tangles impossible.
The cuff needs enough adjustment to sit securely above the ankle or around the intended calf position. Close it fully and pull against it gently in the shop. If it rolls, slips or barely overlaps, choose a better-fitting cuff rather than tightening it until it hurts.
Leash components, materials and what to check
Materials differ between products, so confirm the actual construction rather than treating every entry as a specification.
| Component | Common materials | What to check before buying |
|---|---|---|
| Cord | Usually polyurethane; verify any polyethylene or stretch-core construction in the product description | Even thickness, no cracks, and normal recovery after gentle flexing |
| Cuff | Neoprene padding with webbing and hook-and-loop or a purpose-designed closure | Secure strap, no fraying, snug fit above the ankle or calf |
| Swivel | Stainless steel or brass fittings, depending on design | Free rotation, no corrosion and no catching during a gentle pull |
| Rail saver | Broad webbing, sometimes with rubber or foam padding | Covers the rail area fully and keeps narrow cord or string off the rail |
| Deck plug | Board-mounted plastic or metal-reinforced anchor; construction differs by board | Secure anchor, intact bar and no cracks around the plug |
Don't give a new cord a hard stretch test or try to prove a swivel's breaking strength by hand. You're checking assembly and smooth operation, not certifying its load capacity. A swivel that catches under gentle handling is a reason to reject the leash, whatever its price.
Use the video to familiarise yourself with the setup, then follow the fitting instructions supplied with your particular leash.
Match features to the rider
A beginner on a soft top should prioritise a comfortable, secure cuff and a connection compatible with the board's attachment system. A shortboard surfer near reef needs durable construction and a careful attachment check, not the smallest possible hardware package. A longboarder in more powerful swell needs a suitable cord and cuff without sacrificing easy movement around the deck.
Tail hardware also needs space to work. When positioning traction, use the surfboard tail-pad guide to avoid crowding the leash plug or obstructing inspection.
Leash Rules and Safety Limits in New Zealand
Under the Tairāwhiti Navigation Safety Bylaw 2024, surfboards and similar unpowered craft are excluded from a listed lifejacket requirement when a leash appropriate for the conditions is used and the craft is within 200 metres of shore. That's a conditional local provision, not a blanket exemption for anything with a cord attached.
For Gisborne surfers, the important words are about suitability and conditions. Being close to the beach doesn't turn a damaged leash into acceptable equipment, and the provision shouldn't be assumed to apply unchanged elsewhere.
SUP surfing has specific conditions
Nationally, Maritime Rule 91.4 does not apply to a SUP surfer attached to the board by a leash that is fit for purpose and suitable for the circumstances. Don't extend that surfing provision automatically to flatwater touring, river paddling or every other use of a paddleboard.
The Maritime NZ class exemption for SUP surfing explains the reasoning: retaining the board provides a more effective safety outcome in the surfing zone than merely carrying a personal flotation device, while reducing the risk of an uncontrolled board injuring other water users. It applies specifically to stand-up-paddleboard surfing.
Check the applicable local navigation rules and your intended activity before paddling out. If your session involves a transition between surf and a different paddling environment, resolve the equipment requirements for the whole route rather than relying on a surf-only assumption.
Compliance isn't a safe-surf guarantee
A leash can fail, and a board can still hit someone while attached. Keep control of your equipment and leave room for other surfers rather than treating the cord as permission to abandon the board.
- Choose conditions within your ability. A heavy-duty leash doesn't make an exposed break suitable for an inexperienced rider.
- Plan for separation. Consider your swimming ability, exit points and what happens if the board is no longer available.
- Protect other water users. Follow sound surfing etiquette, including spacing and responsible board handling.
When warnings, current or the paddle-out exceed your ability, the useful purchase isn't a stronger promise on a packet. Choose a more sheltered session or stay ashore.
Inspect, Replace and Dispose of a Worn Leash
Check the leash before entering the water, especially after a hard loading event. ACC and Surfing New Zealand's surfing safety advice specifically includes looking for cuts in the leash and wear in the leash string at the deck plug.
- Inspect the cord. Look along its full length for cuts, nicks, flattened sections and damaged moulded ends.
- Check the string. Examine where it contacts the plug bar and where the rail saver passes through it.
- Turn the swivels. Confirm smooth movement without stiffness, catching or visible corrosion.
- Close the cuff. Remove sand and check the stitching, fastening and release tab.
- Assess recovery gently. Look for permanent thinning or distortion rather than pulling the cord hard to test it.
This checklist is useful to keep with your pre-surf routine.
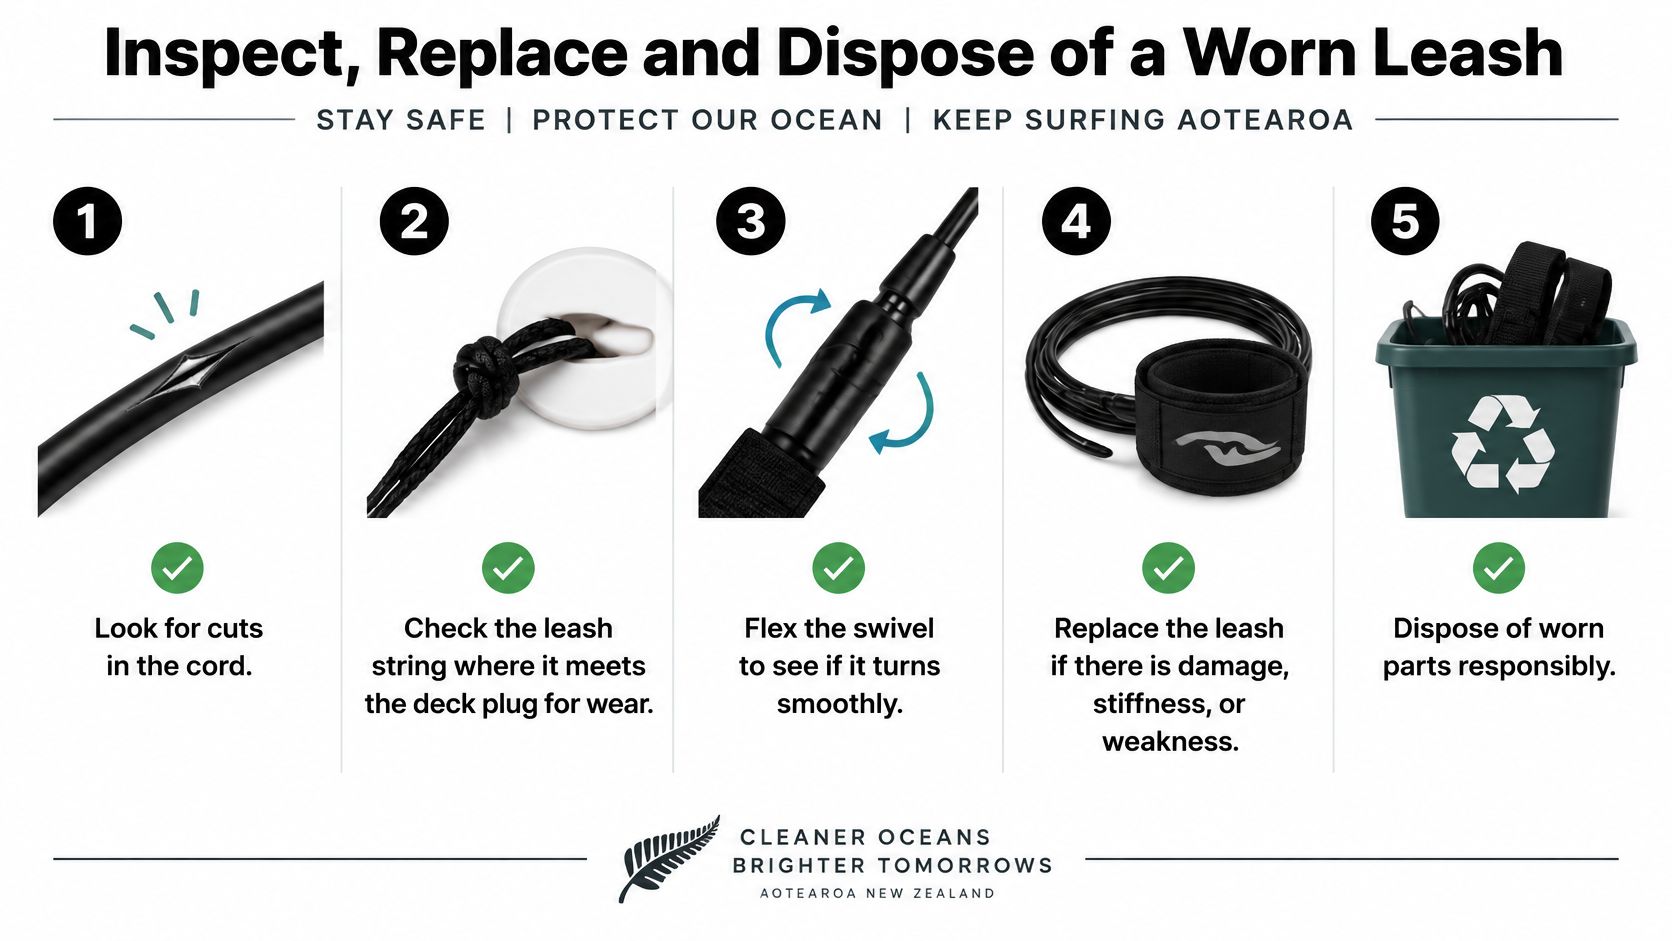
Retire structural damage, not just ugly gear
A storage curl or superficial discolouration isn't the same as a cut, split or permanently thinned section. Equally, an apparently tidy leash can have a weak string or failing cuff. There's no universal replacement calendar that accounts for every surfer's use, storage and loading history.
Replace a cut cord, torn cuff or binding swivel. Stop using a board with a loose or cracked plug until the attachment is properly repaired. Don't rely on knots, glue or a patched cord for serious surf, and use compatible replacement components only where the manufacturer supports them.
Rinse the leash and metal fittings in fresh water after use, dry it away from direct sun and store it loosely coiled. Don't leave it wound tightly around fins or the tail.
Dispose of mixed materials responsibly
The Ministry for the Environment reports that 67% of items counted in 2023 beach-litter surveys were plastic, and notes that ingestion and entanglement can injure or kill marine animals. Retiring a leash should mean removing it from use and managing the waste, not leaving loose cord behind.
- Remove the cord and cuff from the board.
- Separate metal swivels and fittings from polyurethane, rubber and textile parts where this can be done safely.
- Check with your council or recycling centre about accepted materials. Don't assume mixed surf hardware belongs in kerbside recycling.
- Never leave cords on the beach or loose beside a bin. If no recovery option exists, contain the retired parts and use the council-approved residual-waste route.
Choose Your Surf Leash and Buy from Blitz
A useful surf leash for sale is one you can match to a real session. Start with your usual board and break, not a brand preference or an ambitious heavy-surf plan. The right choice should make sense before you look at colour or packaging.
At Blitz Surf Shop, we sell leashes alongside wax, earplugs, fins, grips, paddles, roof racks and boardbags, with budget-friendly options for beginners through to premium gear for experienced riders. That lets you organise the leash and other surf hardware together without treating the cheapest cord as the automatic starting point.
Make the final choice deliberately
- Confirm the use. Identify your board type, usual wave power and whether strong-current environments require a different release arrangement.
- Choose the dimensions. Compare the board's actual length with the proposed leash, then assess cord construction for the load and intended surf.
- Check the fittings. Prioritise a protective rail saver, secure cuff, suitable swivels and the correct attachment or release system.
Don't pay for extra bulk you won't use, but don't save money by selecting a lightweight model outside its intended conditions. If you alternate between mellow beach breaks and more demanding sessions, assess each use carefully rather than expecting a single compromise to cover everything.
We're based in Gisborne and offer shipping across New Zealand. Gisborne and East Coast riders can contact our team for help matching a leash to local breaks, particularly when board volume, cuff fit or exposed-coast conditions complicate the choice.
Compare the currently available leash options on our site, and check current delivery terms before ordering. Keep your board dimensions and usual conditions beside you while shopping so you can make the decision on fit and function.
Blitz Surf Shop offers leashes and the surf hardware to complete your setup, with options for beginners and experienced riders. Visit Blitz Surf Shop, pick the leash type that matches your conditions, check its length and construction against your board, and add the suitable option to your cart.


