

Men accounted for 69.9% of New Zealand surfing participants, despite representing 48.0% of adults, in Sport New Zealand's 2013/14 surfing profile. That makes men's equipment a core category, but it doesn't make one setup right for everyone. The useful question isn't which gear looks most advanced. It's which board, leash and wetsuit work together for your body, your ability and the conditions you paddle into.
Good surf gear for men should make sessions more manageable, not harder. For an East Coast rider, that often means more board underfoot, a dependable leash and a properly fitted steamer before spending on performance extras.
The Essentials Every Man Needs and What Each Does
Our minimum for East Coast swell is straightforward: a good-quality wetsuit, a surfboard and a leash. We prioritise those because warmth, a suitable platform and a secure connection to that platform matter before any optional upgrade.
Buy in this order, while recognising that a board needs its working hardware before you use it:
- Wetsuit. Make this your first serious cool-season purchase. Choose for the water and your cold tolerance, not how warm the car park feels. Shop men's wetsuits
- Surfboard. Buy for your independent sessions, with size and usable flotation ahead of the logo. Shop surfboards online
- Leash. Have the appropriate leash fitted before paddling out. It needs to suit the board and conditions. Shop surfboard leashes
- Fins. Buy compatible fins with the board, unless they're included. Shop surfboard fins online
- Wax or traction pad. Sort deck grip before the board touches the water. Shop surfboard traction online
- Boots, gloves and hood. Add these when conditions exceed your suit's comfortable range.
- Rash vest. Useful for warmer sessions when sun exposure and rubbing become the main concerns.
Use this checklist to keep the minimum setup clear.
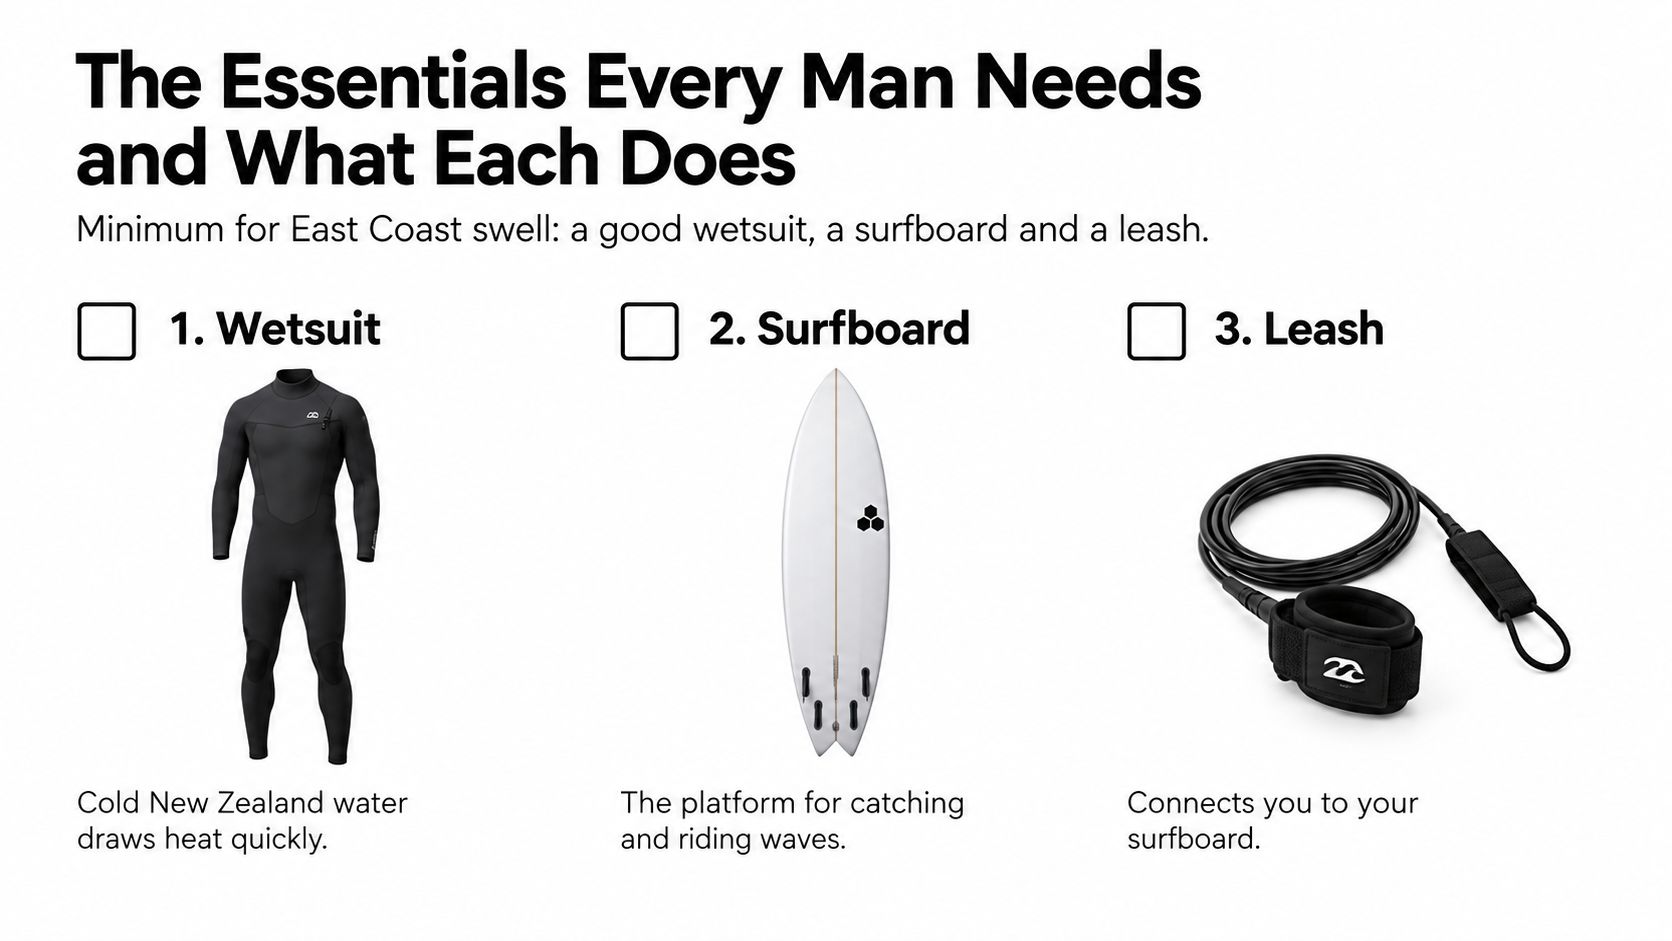
Core surf gear by priority
| Item | Why it matters | Buy first when |
|---|---|---|
| Wetsuit | Cold NZ water draws body heat quickly; the suit is the main thermal barrier | Before your first cool-season session |
| Surfboard | Provides flotation and paddling power; size matters more than brand | Before your first independent session |
| Leash | Keeps the board attached after a wipeout | Before paddling out on any board |
| Fins | Control steering and hold in the wave | With the board, matched to its fin base |
| Wax or traction pad | Provides grip on the deck | With the board; match wax to water temperature |
| Boots, gloves and hood | Protect hands, feet and head when your suit alone isn't enough | When water falls below your suit's comfort range |
| Rash vest | Covers sun exposure and chafing in warm water | For summer and northern beaches |
Spend on the essentials first, with enough budget left to make the board usable. Accessories can follow as your sessions become regular and you discover which conditions limit you.
Wetsuit Thickness for Your Water Temperature and Coast
The most common mistake is choosing a wetsuit by air temperature. Sunshine doesn't tell you how the water will feel after a long paddle, and a warm afternoon doesn't remove the need for winter coverage.
Start with local water temperature, then adjust for wind exposure, session length and how easily you get cold. Treat the following bands as starting points, not promises that every surfer will be comfortable.
Wetsuit thickness by water temperature and NZ use
| Water temperature and typical NZ use | Suit to consider | Add-ons |
|---|---|---|
| Above about 18°C, such as summer on northern beaches | 2 mm steamer or summer suit | Vest for wind; hood and boots rarely needed |
| 15–18°C, Gisborne shoulder seasons from Easter to spring | 3/2 mm full suit | Versatile East Coast baseline; consider a vest for windy days |
| 12–15°C, winter and early starts | 4/3 mm full suit | Hood for strong offshore wind or long surfs |
| 9–12°C, cold southern winters | 4/3 mm full suit, subject to cold tolerance | 3–5 mm boots and gloves; hood on exposed breaks |
| Below about 9°C, exposed southern and Canterbury breaks | 5/4/3 mm full suit | Hood, boots and gloves; shorter sessions |
The cooler-water benchmarks align with Surfcheck's New Zealand wetsuit guidance, including the move towards thicker suits and accessories in southern regions. The summer option is a lighter starting point, while the coldest overlapping bands call for particular caution rather than choosing the thinnest option automatically.
The simplified chart is useful for a quick warm-water comparison.
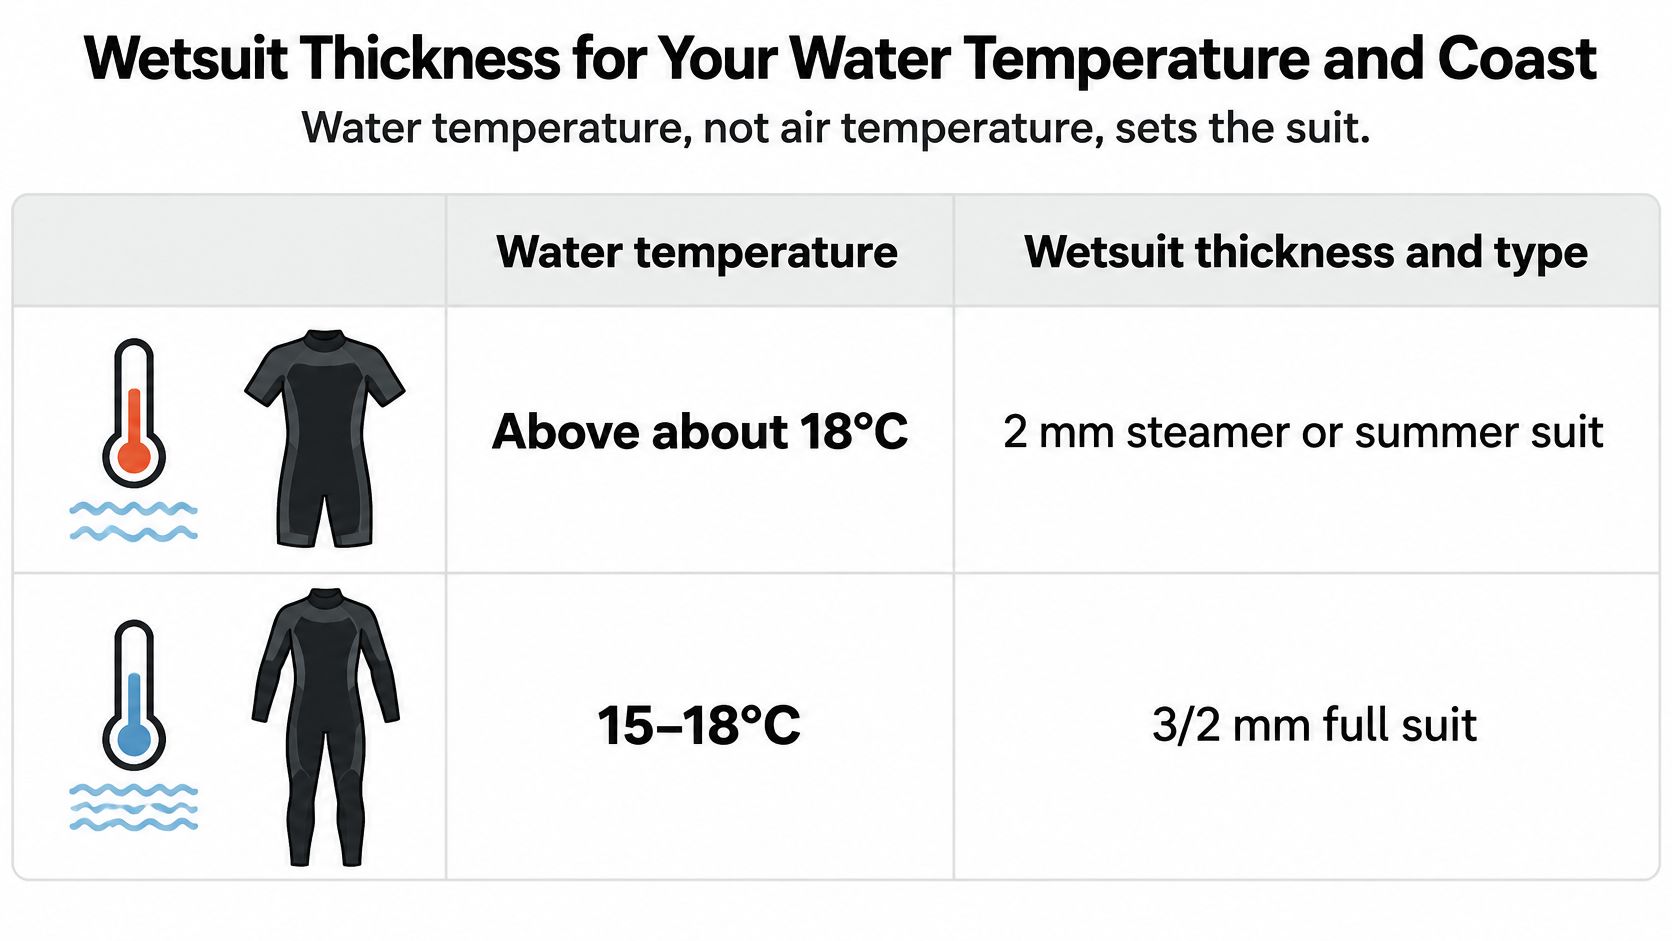
Adjust for the coast and the session
Gisborne and the North Island's east coast call for a different wardrobe from exposed southern breaks. On the west coast, assess the actual water and wind rather than assuming a northern location means a light suit will do.
NIWA's overview of New Zealand's climate puts mean annual air temperatures at about 10°C in the south to 16°C in the north. Those aren't wetsuit-selection temperatures, but they underline why a single nationwide seasonal recommendation is too blunt.
A long session in wind can require more coverage than a quick surf in the same water. A southerly change can also make the exit and change out of your suit uncomfortable, even after a warm start.
Practical rule: Choose enough warmth for your normal session, not just the paddle out.
Riders moving from a suit more than five years old into a current model such as a Hyperfreak often tell us the biggest difference is reduced resistance. That's a shop-floor observation, not a guarantee that every newer suit will suit every body.
A modular setup makes sense through variable seasons: a steamer with separate boots, a hood or a compatible vest. Our NZ wetsuit thickness guide helps narrow the choice before fitting.
For a visual companion to your wetsuit research, use the video below.
Wetsuit Fit Tests That Matter More Than the Size Label
The label gets you into the right part of the rack. Movement decides whether the suit fits. Brand sizing isn't interchangeable, and a comfortable standing pose doesn't tell you much about paddling.
Our fitting process starts with what you value most: flexibility, warmth or durability. Someone doing short, active sessions may make different compromises from a rider sitting through long winter lulls.
Wetsuit fit tests and warning signs
Run these checks with the suit properly pulled into position, rather than leaving spare material around the waist or knees.
| Test | Looks right when | Warning sign |
|---|---|---|
| Squat | Knees and seat move freely with no chest pull | Chest or thigh pulls, or the suit lifts at the knee |
| Paddle | Arms reach a full stroke without tightness at the underarm | Shoulders feel restricted or breathing feels shallow |
| Shoulder rotation | Shoulders turn without lifting the torso | Neck or underarm gaps appear |
| Back and neck seal | Snug, with no gap when you arch | A gap appears that could admit water during a duck-dive |
| Crease check | Neoprene lies flat at knees and calves | Folds create pockets where water can collect |
| Length | Sleeves and legs end at wrist and ankle without bunching | Bunched cuffs prevent an even seal |
A wetsuit needs a close fit to limit flushing, the repeated replacement of warmed water with cold water. Loose lower-back, neck and underarm areas can undermine the warmth you expected from the thickness rating.
Going tighter isn't the automatic answer. Excessive compression across the torso can restrict breathing, while tight shoulders make every paddle stroke harder.
Use measurements, then test movement
Measure your chest, height and weight against the relevant brand chart. If you fall between sizes, try both where possible and let the squat and paddle tests decide.
Don't size up just because entry feels awkward. First check that the suit is fully seated at the crotch and shoulders, then assess its working fit.
Seam construction deserves attention alongside sizing, especially if warmth is your priority. Our guide to surfing wetsuit seams explains what to compare without letting technical labels replace a proper try-on.
Choosing a Surfboard for Your Ability, Wave Size and Tide
Board choice is part of the same buying decision as your suit and leash: match it to the water you surf on the East Coast, and a bigger, more forgiving board will serve you better than an advanced shape you can't paddle.
| Board type | Best for | Ability level | Suits waves |
|---|---|---|---|
| Soft-top or foamie | Learning balance and paddling | Beginner | Small, gentle, slow waves |
| Funboard or mid-length | Progression and everyday East Coast surf | Beginner to intermediate | Knee to head-high waves, depending on design |
| Shortboard | Manoeuvres and speed in powerful surf | Intermediate to advanced | Head-high and bigger, with power |
| Fish | Fast turns in small, weak surf | Intermediate to advanced | Small to waist-high waves |
| Longboard | Cruising and noseriding | Any level, with appropriate handling skills | Mellow waves from small to head-high |
Treat these as starting points. A rounded mid-length and a performance mid-length behave very differently, and a beginner still needs instruction to handle a longboard safely around other surfers.
The silhouettes help distinguish the main shapes before you compare individual designs.
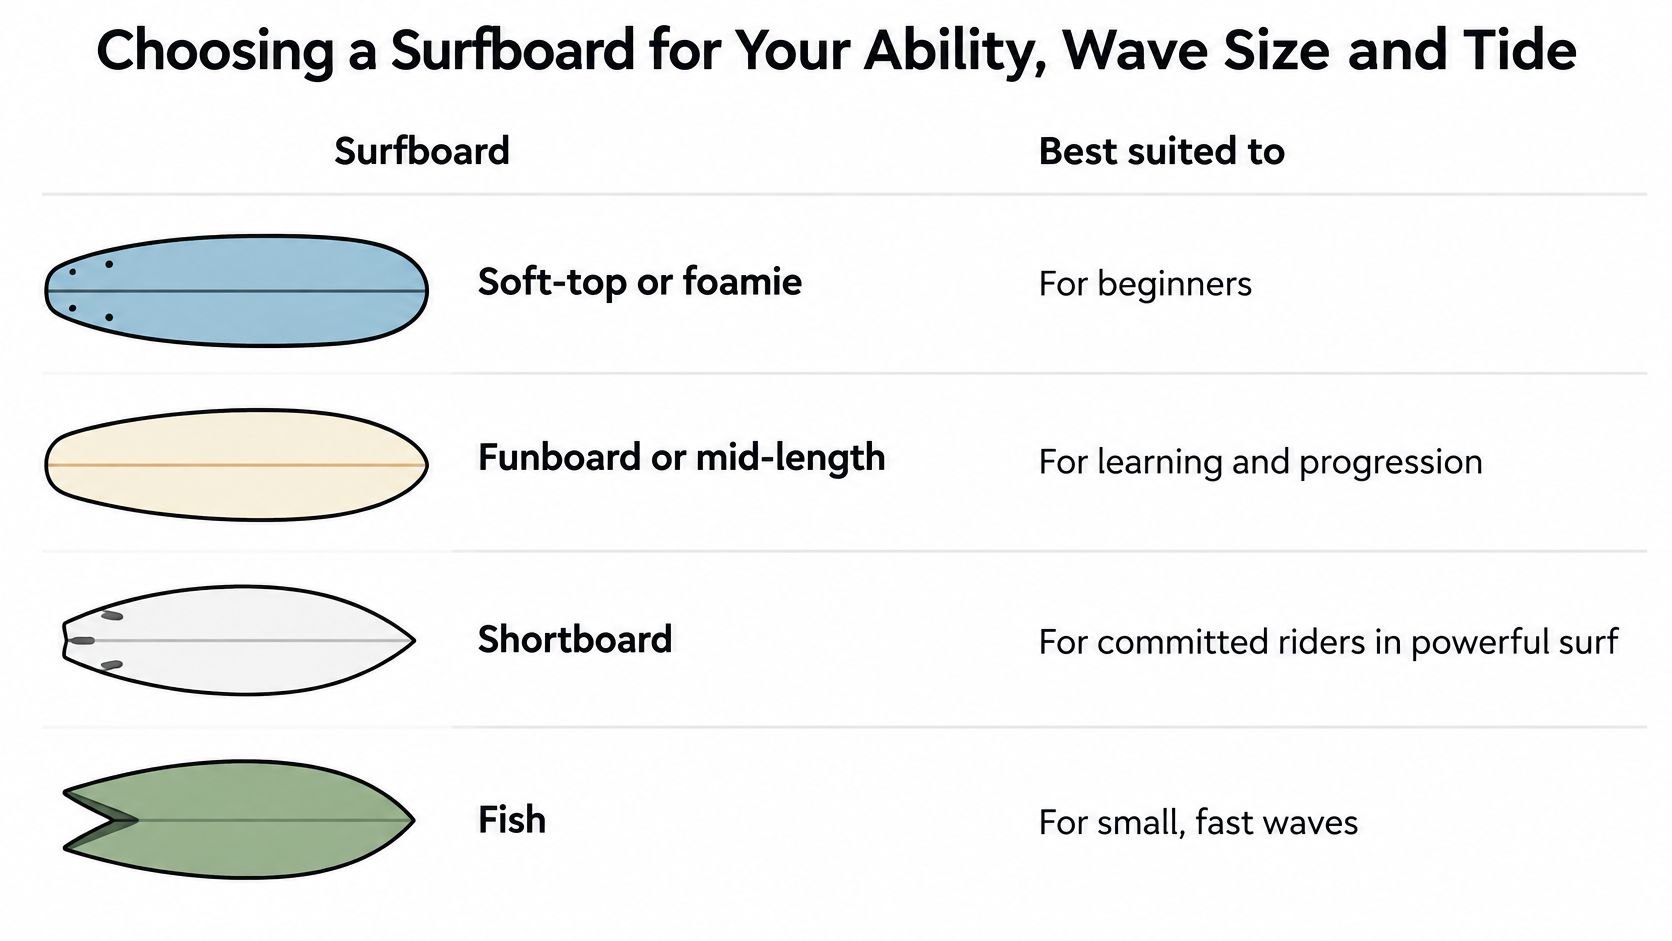
Volume must suit the rider
Board volume is useful flotation. Beginners and heavier men generally need more support than a small performance board offers. If you struggle to paddle into waves, buying something narrower because it looks responsive makes the problem worse, and I've watched plenty of riders learn that the hard way.
More volume isn't the whole answer either. Outline, length and how that volume is distributed still decide whether you can control the board.
A softboard makes sense when the immediate job is learning balance and consistent take-offs. A mid-length suits someone who wants progression without giving away all their paddling support, while a shortboard asks more of the rider and the wave.
For a weight-and-ability starting point, use our surfboard sizing guide. Then judge the shape against the break you surf.
Gisborne conditions show why one board has limits
A MetService Gisborne–Mahia surf forecast for Wainui Beach recorded approximately 1.0 m waves, 0.8 m swell and 12–14 second periods. Treat that as a forecast example rather than a permanent description of the break, since swell and period shift with each system that moves through.
Even within one beach, conditions can swing enough that a board picked for manageable everyday surf becomes awkward when the swell builds and packs more power. Check the forecast before you load the car, and choose the board for the conditions arriving.
A versatile mid-length covers useful middle ground for a capable rider. Others will need different boards for different swells, and sometimes the right equipment decision is not to paddle out at all.
Tide changes the same bank
NIWA's sea-level guidance gives spring-tide ranges of approximately 1–2 m on the east coast, compared with 3–4 m on the west coast. The smaller eastern range still changes water depth, where waves break and how steeply they stand up.
More flotation helps on softer, slower-breaking banks at the wrong tide. A capable rider may prefer a more responsive board as the face steepens, but dropping volume won't compensate for limited technique.
Buy for the waves you regularly surf, not the exceptional day you hope to score.
Leashes, Fins and Protection as One Safety System
A surfer's own board causes plenty of the cuts and knocks that end sessions early. That puts the leash, fins and protective gear inside the same buying decision as the board itself. A rider who spends everything on a refined shape while running a cracked leash has the priorities backwards.
Check the whole connection before each session, and treat the reference below as your replacement guide.
Surf hardware choice and replacement triggers
| Item | Choose by | Inspect or replace when |
|---|---|---|
| Leash | Board length and expected wave size; thicker cord for bigger surf | Swivel stiff, cord stretched, cuff cracked, or cuts and flattened sections appear |
| Fins | Board type, fin base and flex | Fin is chipped or loose, or a box or screw has movement |
| Wax or traction pad | Water-temperature band printed on wax; suitable pad placement | Deck feels slick or pad texture has worn away |
| Helmet | Shallow reef or rock, large surf, repeated head-contact exposure | Hard impact or cracked shell; follow manufacturer replacement guidance |
| Nose guard and rail protection | Beginner falls and compact boards | Guard is peeled, loose or worn |
A leash is a working part of the setup and wears out like one.
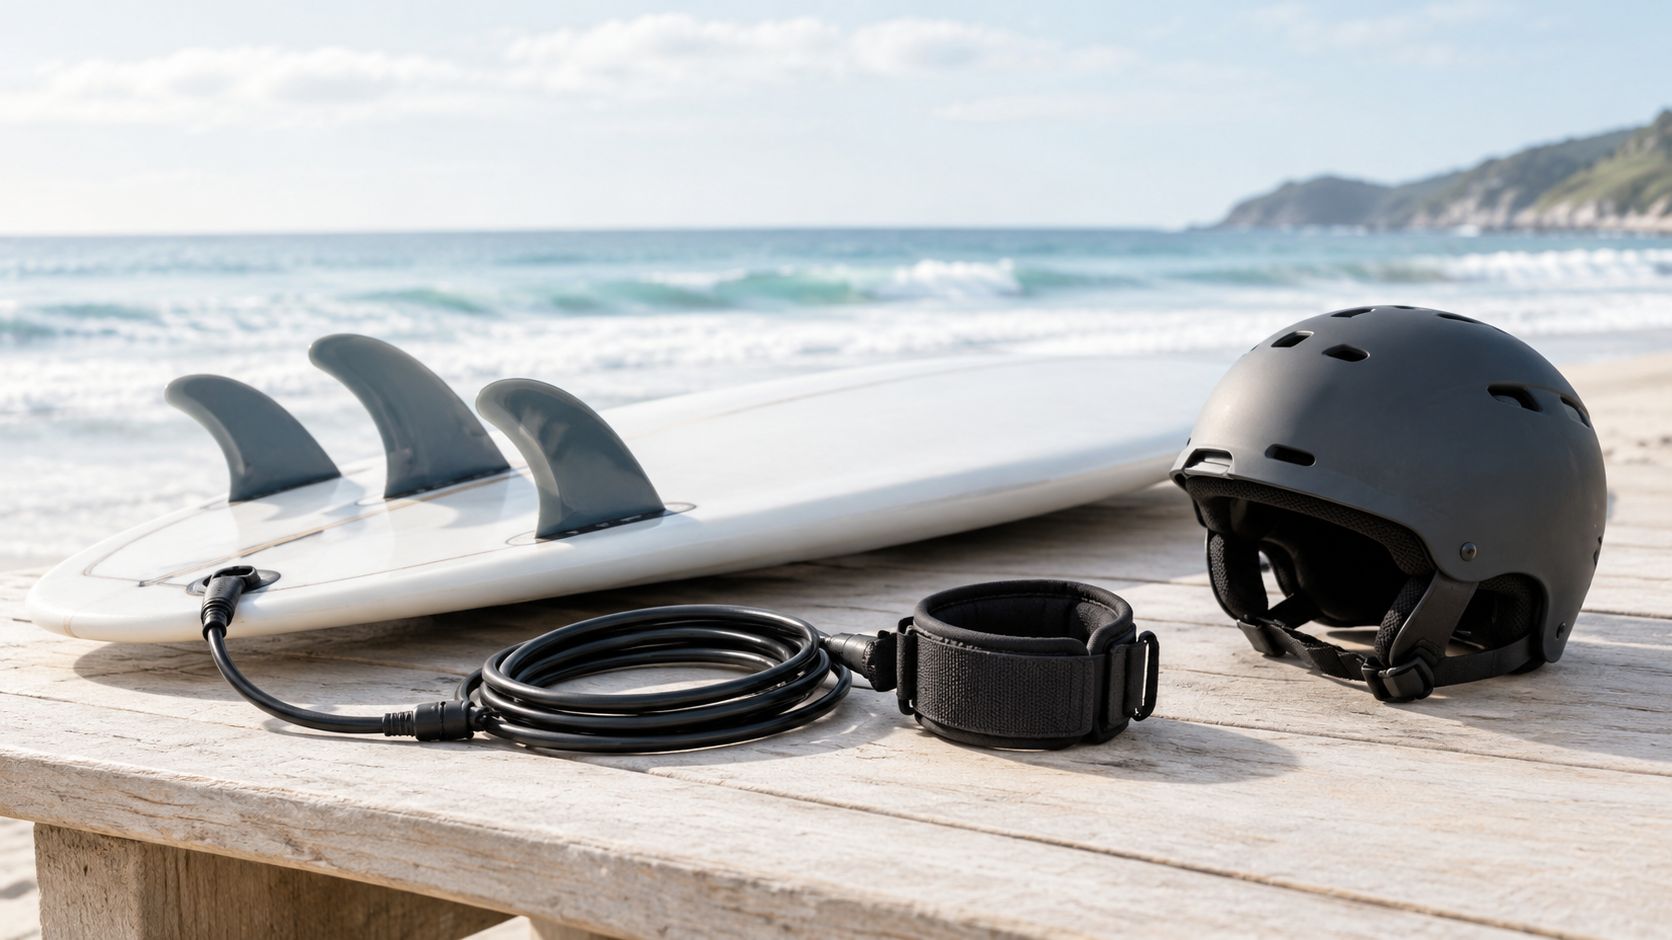
Inspect the connection, not just the cord
The swivel, rail-saver, cuff and cord all carry load. UV cracking, stretched sections and cuts are reasons to replace a leash, however well it survived yesterday.
Match length to the board and cord strength to the conditions you surf. A thicker cord is usually the sensible everyday choice for a heavier rider or more powerful beach breaks, while a thin competition cord saves a little drag and nothing else. Our New Zealand surfboard leash guide separates those decisions in detail. A leash keeps the board attached to you; the conditions decide whether you should be out there.
Match protection to the consequence
A helmet earns its place around shallow reef, rock and larger surf. Nose guards and fin-edge protection take the edge off learning falls, though board contact still hurts.
Cold water adds one more protection question. Repeated exposure to cold water and wind can lead to surfer's ear, and the answer is proper plugs rather than guesswork. For advice on suitable options, Z Audiology's hearing protection services provide a specialist resource worth consulting. An ordinary accessory is a poor substitute for guidance about your ears.
Repairable hardware is often better value than repeated replacement. Damaged attachment points, loose fin boxes and worn safety gear need sorting before the next session, because gear that fails in the water picks the worst moment to do it.
A reliable leash, secure fins and a suit that fits will do more for your season than premium hardware on a board that suits somebody else.
Boots, Hoods, Apparel and Accessories Worth Buying
Buy accessories against a condition you can name. Cold feet, an exposed change, a slippery walk or sun exposure are useful reasons; matching the rest of the kit isn't.
Cold and exposed sessions
- Boots for cold water. The thickness table's cold-water bands are the starting point. Fit should be secure enough to avoid excess movement without crushing your toes; our wetsuit boots guide helps with the choice.
- Gloves for long winter surfs. Check that you can still grip the board and manage your leash cuff. Warmth that leaves your hands awkward isn't a complete solution.
- Hoods for windy, exposed breaks. Test the face opening and neck overlap with your suit. A hood that interferes with turning your head needs a different fit.
Targeted coverage can be a better purchase than replacing an otherwise suitable steamer. It won't rescue a poorly fitting suit, but it lets you adjust the setup without buying everything again.
Warm water and time around the beach
- Rash vest for sun and rubbing. Choose a close, comfortable fit for paddling rather than excess fabric that gathers under your chest.
- Boardshorts or walkshorts for summer use. Look for quick-drying fabric, a secure drawstring and a cut that doesn't catch at the knee. Check the waistband against your normal paddling position.
- Footwear for hot sand and rocky access. Choose for the actual approach. Beach footwear shouldn't be treated as permission to walk across a sensitive reef.
- Sunglasses for shore time. Polarised lenses and a retainer strap are practical around the beach, but ordinary sunglasses aren't protective surf equipment.
- Surf hat for exposed sessions. A secure chin strap matters in wind. Check that the brim doesn't obstruct your view when prone.
Clothing and headwear don't cover every exposed area. For sunscreen planning, consult sun protection advice from Mesoderm RX alongside the directions on your sunscreen.
Carrying and changing
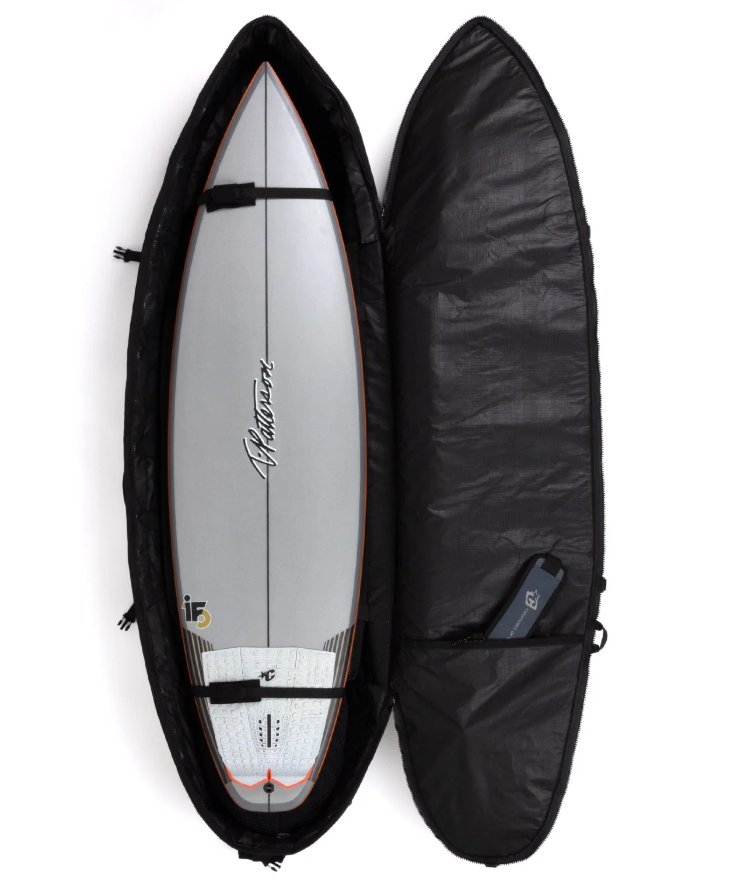
- Boardbag for transport. Use it to protect rails and the board during roof-rack trips or travel. Check clearance around fins rather than forcing the zip.
- Hooded towel or changing robe after cold sessions. Pick something that gives you room to change without dragging wet gear across the ground.
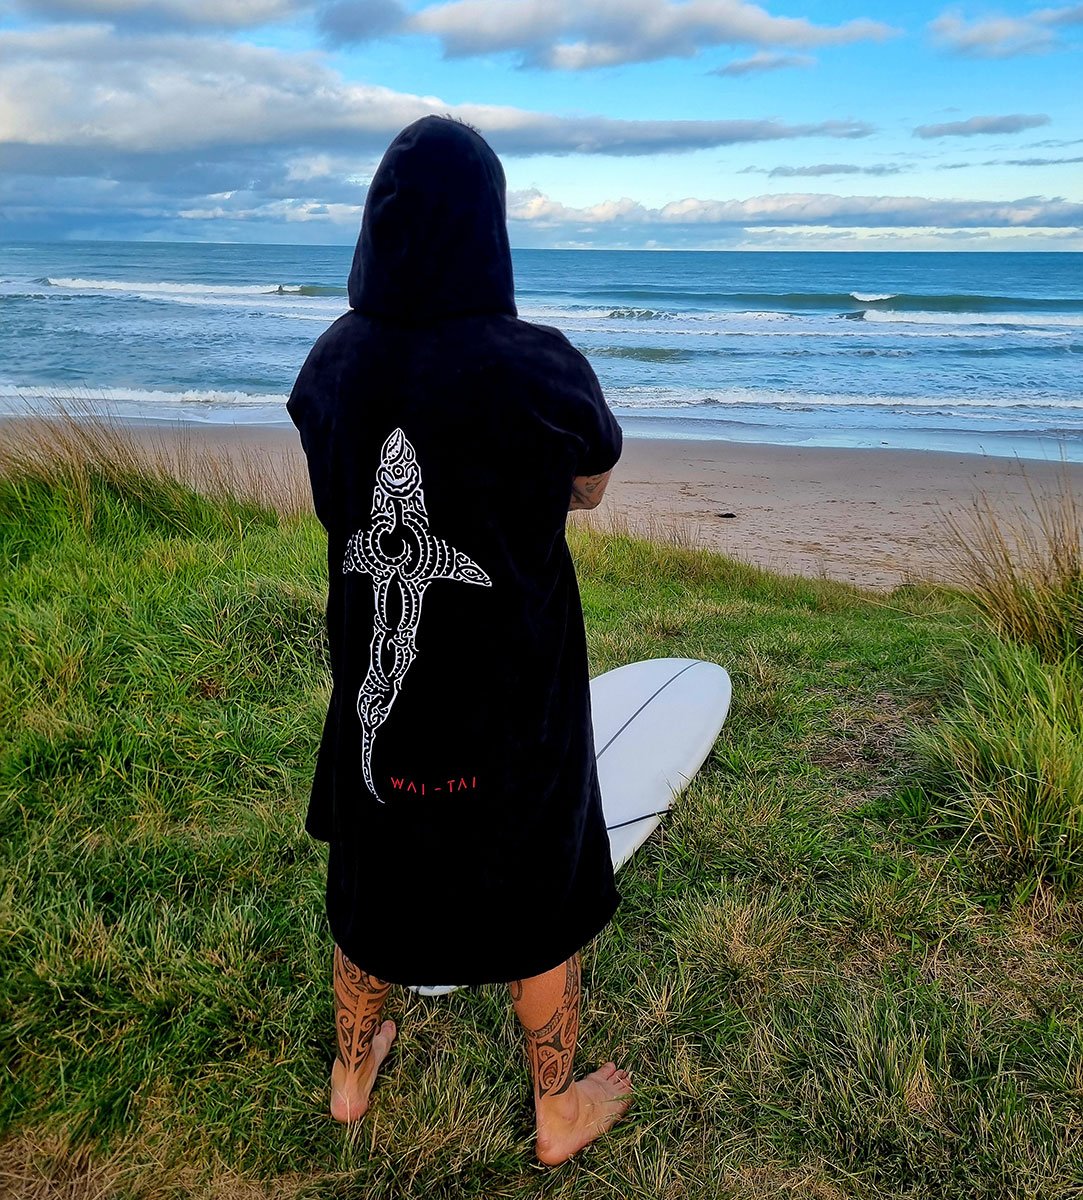
Buy for the season: A cheap accessory you can't comfortably use is poor value, even before it needs replacing.
Pick Your Setup and Confirm Its Fit Before You Buy
Choose a starting setup by how you surf, then check each component against your body and local conditions. A board, leash and wetsuit work as one system. Buying each piece off its own spec sheet is how riders end up with gear that fights itself.
A bigger board, a sound leash and a suit that seals will out-surf an advanced model bought too small.
Match the setup to the rider
- Summer beach breaks. A light steamer or suitable vest and boardshorts can work in warm conditions. Choose a funboard for accessible paddling or a fish if you already have the skills to use it.
- Year-round East Coast surfing. Plan for a shoulder-season steamer and warmer winter coverage, with a mid-length or shortboard appropriate to your ability. Match the leash to the board and add cold-weather coverage when needed.
- Heavier men, beginners and grom parents. Prioritise useful flotation, a dependable leash and appropriate nose protection. Make conservative choices around reef, rock and crowded learning areas.
Check before ordering
- Record your conditions. Note typical water temperature, wind exposure and session length.
- Choose thermal coverage. Use the thickness table rather than the season's name alone.
- Measure accurately. Compare chest, height and weight with the specific brand chart.
- Test the fit. Run the squat and paddle checks when the suit arrives.
- Select usable board volume. Account for your weight, ability and usual waves.
- Match the connection. Choose leash length and strength for the board and conditions.
- Fill remaining gaps. Add boots, gloves or a hood if cold exposure still limits you.
Our men's steamer range runs to 55 products across O'Neill, Rip Curl, Billabong and Quiksilver, with 4/3 mm winter, 3/2 mm spring-and-autumn and 2 mm warmer-water options in sizes from S to 3XL. For most East Coast spring and autumn sessions a 3/2 mm is the working pick. Step up to 4/3 mm once winter water and wind chill start cutting your sessions short.
Our team offers personalised recommendations, so bring your measurements and an honest account of where you surf. Fit decides warmth more than any feature list, and a mid-range suit that seals at the neck, wrists and ankles beats a premium one that flushes.
Blitz Surf Shop offers wetsuits, boards and hardware backed by practical Gisborne advice. Visit Blitz Surf Shop with your usual break, current board and wetsuit fit concerns, and we'll help you choose a setup that suits your regular surf sessions.


