

You've just finished an East Coast surf, peeled off your steamer, and found a fresh fin cut running through the leg. Or perhaps there's a pinhole bubbling water against your side every time you duck-dive. It's frustrating, but it doesn't automatically mean the suit has reached the end of its useful life.
The right response depends on where the damage is, what the outer material is doing, and how much stress that area takes. A small cut can often be glued at home, while a split seam, damaged zip, or failing panel deserves experienced hands. This guide gives you a practical wetsuit repair NZ decision tree, including the kits we sell, the local repairers we recommend, and reuse options when repair no longer makes sense.
Introduction to Wetsuit Repair in New Zealand
A fin cut after an East Coast session can look minor until your fingers catch it and the opening grows. Rinse the suit, dry it fully, then deal with the split before the next surf. Early attention gives you a better chance of containing the damage.
Cold New Zealand water makes a sound repair more than a tidy finish. A weak bond can let water in, while an ignored tear may spread through an area that flexes every time you paddle or duck-dive. Still, many small nicks, pinholes, and clean tears are manageable without replacing the suit.
Bench rule: Diagnose the material and location first. The glue comes second.
Use a simple decision tree. If the damage is small, clean, and on a lower-stress panel, a suitable kit or adhesive from Blitz Surf Shop may be enough. If the material is difficult, the tear sits in a seam, or the zip and stitching are involved, hand the suit to a local specialist. Blitz sells wetsuit repair kits and adhesives, but does not carry out repairs.
For minor gluing and stitching locally here in GIsborne, we recommend Marc Hellesoe (contact us for his mobile numer). For larger jobs such as seam resealing or busted zips, Matt Hall at Stitched Up Wetsuits and Repairs in Papamoa is the better fit. The right handoff can prevent a home repair from becoming harder and more expensive to correct.
Before either option, follow our wetsuit care guide for washing, drying, and storage. Clean, dry neoprene gives adhesive a better surface and helps a repair last.
If repair no longer makes sense, keep the suit in New Zealand's reuse stream rather than sending it straight to landfill. End-of-life options are covered later in the guide.
What Wetsuit Damage You Can Actually Repair
Start by separating surface damage from structural damage. A clean fin cut through nylon-faced neoprene is a different job from a seam that has pulled apart or a zip that no longer tracks correctly.
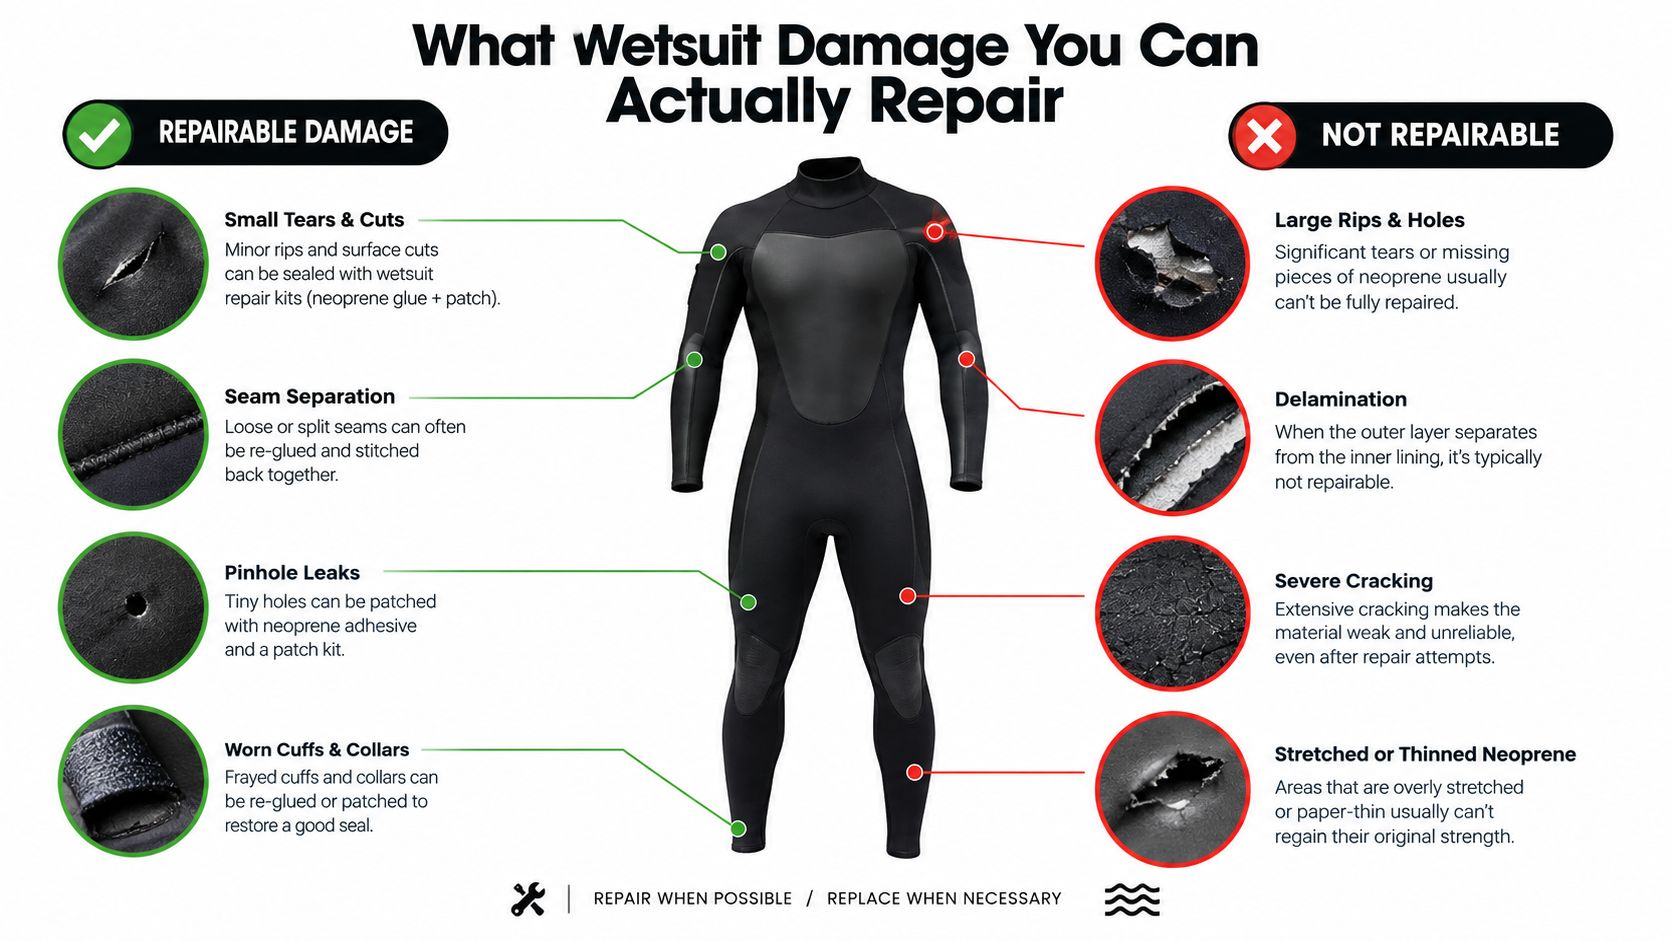
Start with the outer surface
Nylon-faced neoprene is generally the friendliest material for home patching. Adhesive-backed repair pieces can bond to the fabric face, while neoprene cement can chemically join the edges of a small split.
Smooth-skin or cell-diving neoprene needs more care. A standard nylon-backed patch won't bond properly to that smooth surface, so the repair may need a compatible adhesive, a different patching method, or panel work. The material matters more than the apparent length of the tear.
Read the shape and location
A short cut on a low-stress leg panel is usually a simpler repair than a similar cut across a seam, knee, ankle opening, shoulder or underarm. Tear geometry drives the method:
- Small fin cuts and pinholes: Usually suitable for careful glue work if the edges meet cleanly.
- Minor abrasions: May need a thin adhesive layer or a patch if the neoprene has been worn through.
- Split seams: Need bonding along the seam, often with reinforcement tape and adequate curing time.
- Worn knees and bootie areas: Benefit from reinforcement because those zones receive repeated contact and flex.
- Busted zips or major panel damage: Usually belong with a repair specialist rather than a home kit.
Before using any adhesive, rinse away salt and grit with fresh water. Then let the suit become completely dry. NZ repair guidance warns that salt water, oils and trapped moisture can weaken the bond line (Seventh Wave repair patch kit). If you're unsure whether a seam is separating or merely leaking, our guide to surfing wetsuit seams can help you inspect the construction.
Here's a short visual guide to the damage categories before you reach for glue.
How to Fix Small Tears and Pinholes at Home
You finish a session on the East Coast, hang your suit up, and spot a clean fin cut before the neoprene has dried. If the tear is small, clean and accessible, you can often repair it at home. A dedicated wetsuit repair glue or the Ocean and Earth repair kit gives you a practical starting point for this type of damage.
Prepare before opening the glue
Rinse the damaged area with fresh water, removing sand, wax, salt and grime. Leave the suit in a ventilated place until it is fully dry, including inside the foam. Adhesive needs clean, dry surfaces to bond properly, and trapped moisture can weaken the repair.
Place the suit flat with the damage easy to reach. Keep the neoprene relaxed while you work. Bring the edges together gently first, checking that they align without force. If they only meet when you stretch the suit, the tear may need a different repair.
Glue a small rip
For a clean neoprene rip, apply a small amount of Neoprene Glue to both sides, let the first layer dry, apply a second layer, then press the edges together. Leave the repair for the stated cure period before water use. C-Skins' instructions cover this application sequence and the 24-hour cure for its split-seam process (C-Skins repair instructions).
Use the product instructions supplied with your kit, following this order:
- Clean and dry: Remove salt, oils and moisture from the repair area.
- Apply sparingly: Put glue on both sides of the split. A thick layer can leave a hard, uncomfortable lump.
- Let the first layer dry: Use the timing printed with the product.
- Re-glue and align: Add the second layer, line up the edges accurately and press firmly.
- Leave it undisturbed: Do not pull, fold or surf in the suit until the adhesive has cured as directed.
Small pinholes may need only a controlled dab of seam sealer. A split seam can need neoprene tape over the glued line, particularly where the suit flexes repeatedly. NEO-REZ is listed in NZ for sealing seams, repairing rips and filling small holes (NEO-REZ repair glue).
Match the kit part to the damage
The Ocean and Earth Ultimate Wetsuit Repair Kit sold in NZ includes cement, an applicator brush, an iron-on patch, heat shielding paper and instructions. Its listed contents include 15ml of neoprene repair cement and a 120mm x 70mm iron-on neoprene patch (Ocean and Earth repair kit).
| Kit Component | Best Use Case | Key Tip |
|---|---|---|
| Neoprene repair cement | Small tears, fin cuts and damaged seams | Apply a controlled amount and follow the cure instructions |
| Applicator brush | Spreading cement accurately | Keep the glue line narrow rather than flooding the area |
| Iron-on neoprene patch | Larger holes, gouges and worn sections | Use the heat shielding paper and check material compatibility |
| Heat shielding paper | Protecting neoprene during ironing | Do not apply direct heat to exposed rubber |
| Instruction sheet | Timing and application sequence | Follow the supplied instructions rather than rushing |
For a practical comparison before choosing adhesive, read our guide to wetsuit glue in NZ. That guide can help you match a kit or glue to the repair you can safely handle at home.
When to Choose Professional Repair in NZ
A useful dividing line is simple. Glue closes a manageable tear. A professional restores structure. If the neoprene edges line up, the damage is away from a major seam, and the repair area isn't badly distorted, a home kit may be enough. If the suit has a failing seam, broken zip, large panel problem or repeated separation, send it to someone who works on wetsuits regularly.
Home repair or workshop repair
| Damage | Home kit | Professional help |
|---|---|---|
| Small fin cut | Suitable when clean and accessible | Useful if it keeps reopening |
| Pinholes | Suitable with neoprene cement | Consider it if there are many or they sit near a seam |
| Split seam | Possible with the right tape and cure time | Better when the seam carries heavy tension |
| Worn knee or bootie | Patch or reinforce carefully | Preferable when the material is badly degraded |
| Busted zip | Not a sensible glue job | Use a specialist |
| Major panel damage | Usually beyond a basic kit | Use a specialist for panel replacement or structural work |
Blitz Surf Shop doesn't carry out wetsuit repairs in-store. We sell repair kits for DIY maintenance and point customers towards people who can do the hands-on work. Marc Hellesoe, on 0276450028, handles minor repairs involving gluing and stitching. For major repairs such as resealing seams or fixing busted zips, we recommend Matt Hall at Stitched Up Wetsuits and Repairs in Papamoa.
Allow time for proper work
NZ professional repair services indicate that alterations commonly take around one week, while more complex repairs can take several weeks (Wettie alterations and repairs). That timing reflects the work involved, including seam access, cure time, resizing and structural panel repairs.
Before sending a suit: Rinse it with fresh water, dry it completely, describe the damage clearly and ask whether the repairer needs photographs before accepting the job.
Don't mail a wet, sandy steamer and expect a reliable result. Include the affected area in your description, explain whether the leak occurs during movement or only under pressure, and ask what turnaround applies to that type of repair. If you're deciding whether to repair an older winter suit or replace it, compare the condition of the neoprene across the whole garment, not just the most obvious hole.
For general wetsuit selection and replacement planning, our guide to buying a wetsuit can help you assess the type of suit you need.
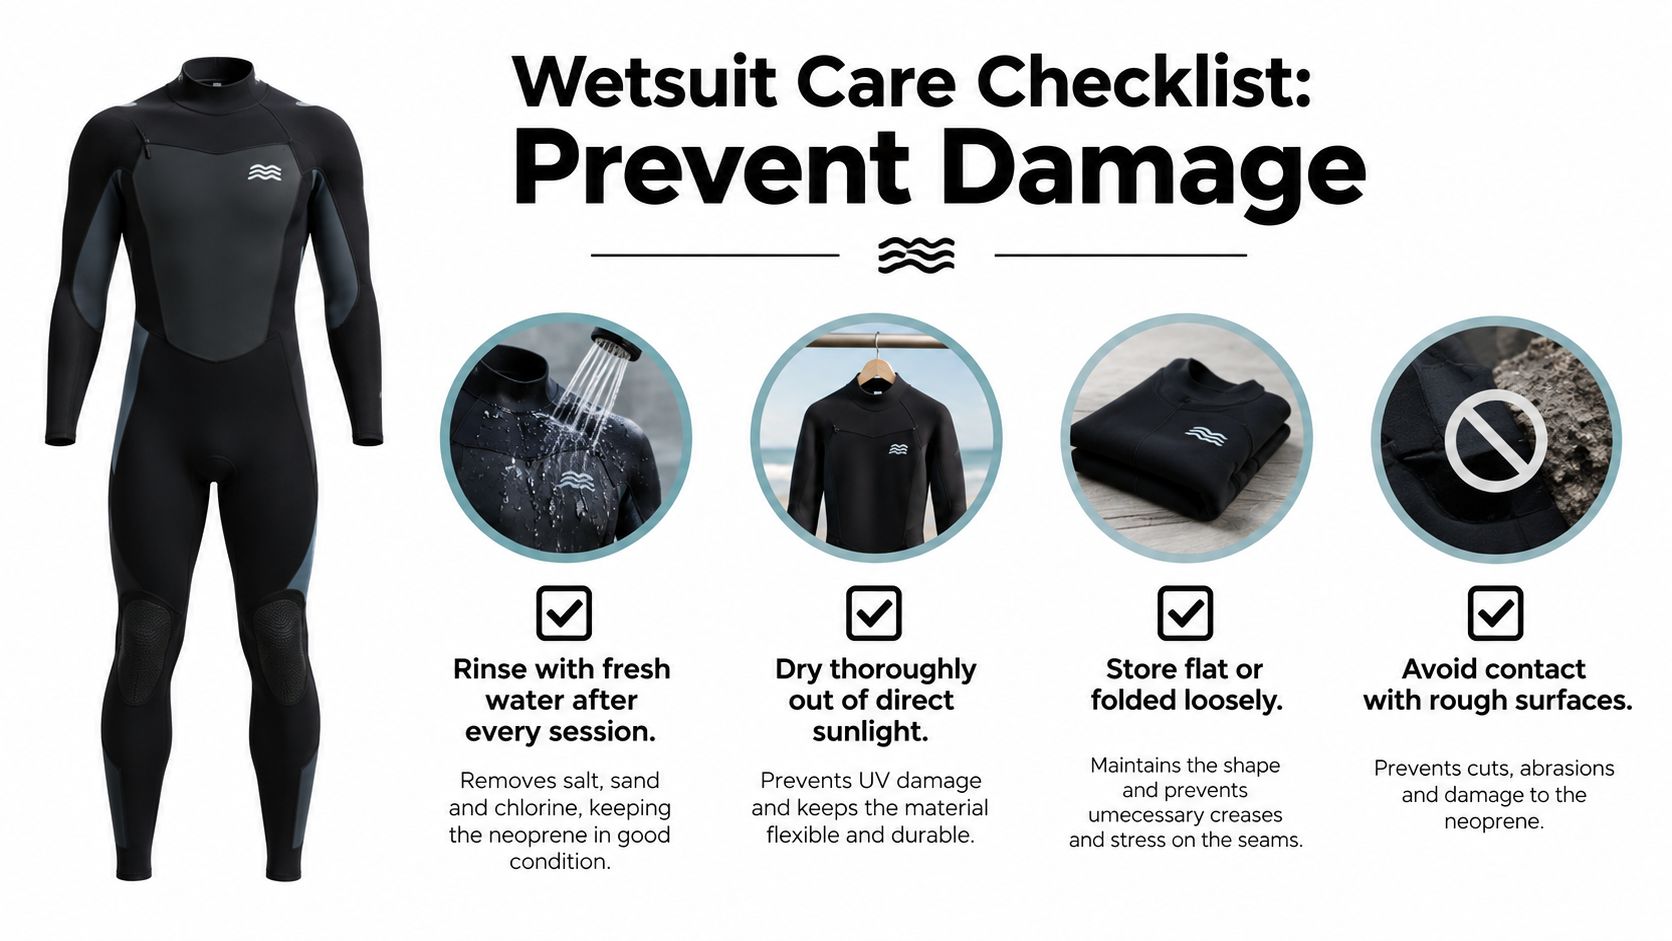
How to Prevent Damage and Extend Wetsuit Life
The easiest repair is the one you don't create. Fin cuts get the attention, but everyday handling also produces pinholes, stretched ankle openings and premature seam wear. Winter steamers work hard in colder New Zealand water, so small weaknesses deserve attention before the next heavy run of surfs.
Rinse with fresh water after each session, then dry the suit thoroughly away from direct sunlight. Salt left in the fabric can affect the surface, while intense heat and direct sun can damage neoprene. Store the suit flat or folded loosely, rather than crushing it into a tight bundle.
Put the suit on without fighting it
Use the pads of your fingers when pulling neoprene into place. Fingernails can puncture the lining, particularly around the hips, thighs, cuffs and ankle openings. Work the suit upwards in small sections, and don't yank from the shoulders or wrists.
Keep the steamer away from rough concrete, sharp car racks, rocks and abrasive changing-room surfaces. A clean towel or changing mat gives the outer face somewhere safer to rest while you pull the suit on.
Treat small faults early
A pinhole that receives a little repair glue before it spreads is a manageable maintenance job. A tear that has been repeatedly stretched, soaked and pulled may need reinforcement or workshop attention.
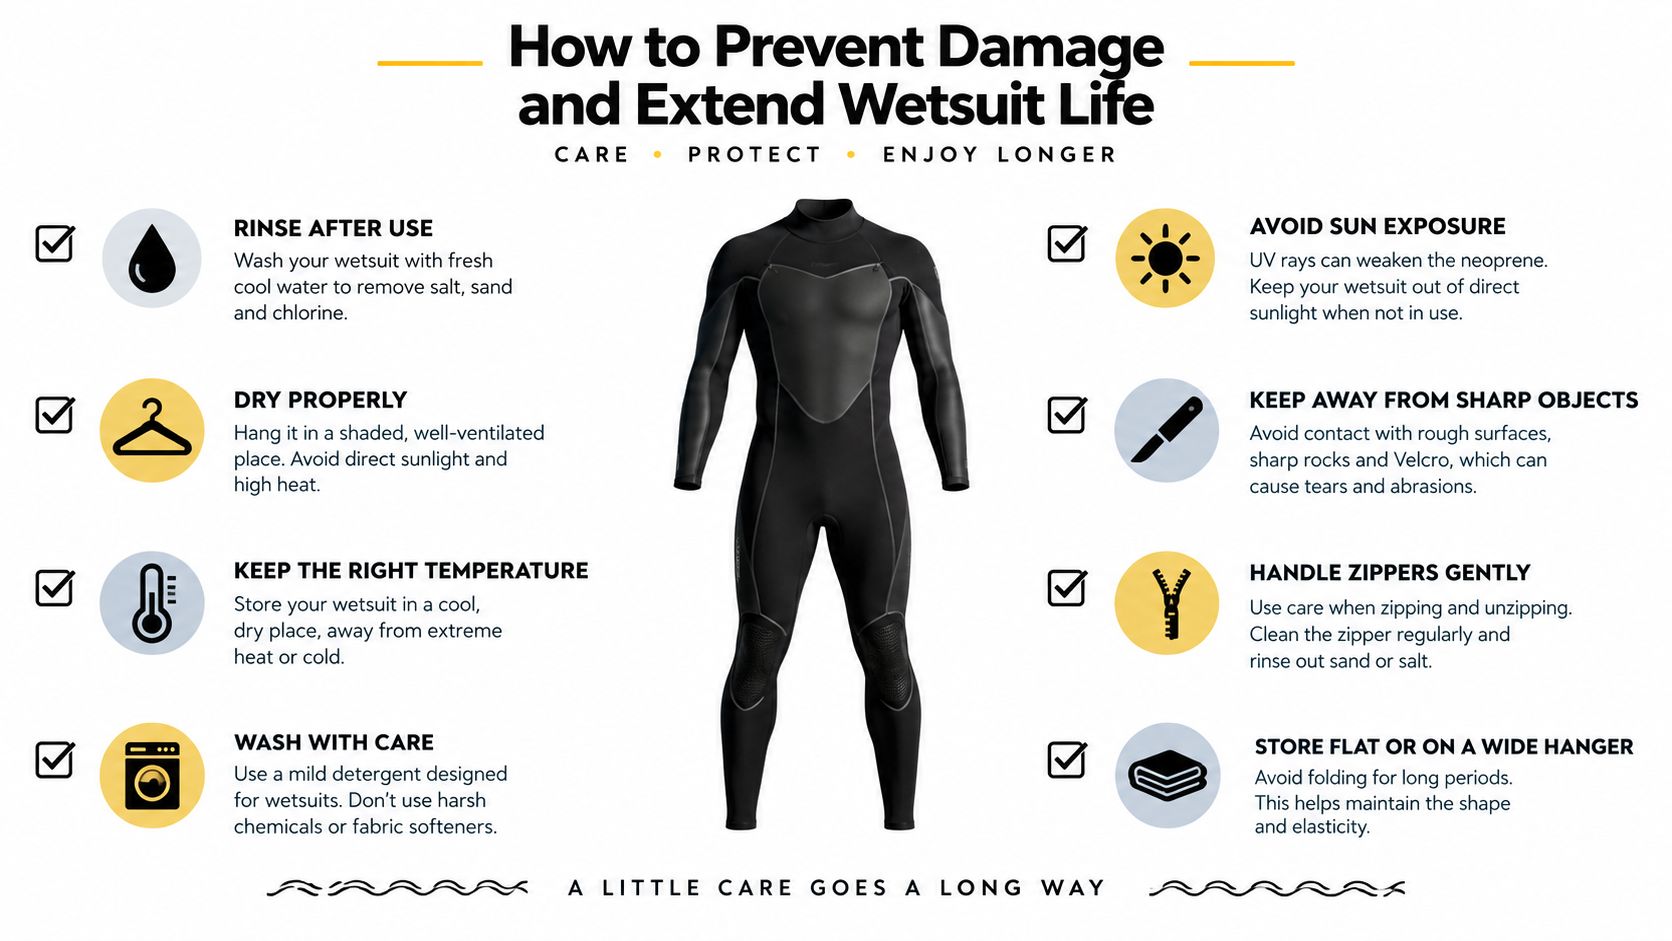
Small, early maintenance keeps a minor leak from becoming a structural repair.
Look closely at knees, seat panels, cuffs, booties and seams when you rinse the suit. If the rubber feels thin, the stitching is exposed or a seam edge is lifting, reinforce it before the next demanding session.
Where to Get Wetsuit Repair Help and Supplies in NZ
A fin cut, pinhole or small rip usually belongs in the home-repair lane. Start by matching the product to the fault. The Ocean and Earth Ultimate Wetsuit Repair Kit includes cement, brush, patch, heat-shielding paper and instructions. NEO-REZ suits seam sealing, rips and small holes. Cement bonds clean edges, while a patch adds support where the neoprene is more widely gouged or worn.
If you are comparing products, this guide to buying the right repair kit explains what different kits are designed to handle. Adhesive is like the right tool on a workbench: the strongest-looking option is not automatically the right choice for every material or fault.
For local help with minor gluing and stitching, contact Marc Hellesoe on 0276450028. Hand over busted zips, major seam resealing and structural panel work to Matt Hall at Stitched Up Wetsuits and Repairs in Papamoa. We do not perform repairs ourselves, but we stock DIY products and can help point you towards the appropriate repair pathway.
A worn-out suit does not have to go straight to landfill. The 2nd Suits programme has operated since 2008, giving retired suits a second life by passing them on through community partners (2nd Suits). Zhik's reZHIKle programme accepts eligible Zhik suits through participating stores in Auckland, Wellington and Christchurch. Rip Curl's NZ programme accepts used surf wetsuits from any brand at participating stores, with collected neoprene processed into products including flooring and protective matting (Zhik reZHIKle).
Use this decision checklist:
- Diagnose: Check the material, tear shape and location.
- Choose DIY: Glue small, clean damage in a low-stress area with the correct kit.
- Call a pro: Pass on zips, major seams and structural panel failures.
- Prepare properly: Rinse, dry fully and describe the fault clearly.
- Maintain afterwards: Rinse, dry, store carefully and address small faults early.
For local surf advice and supplies, read the Gisborne surf shop guide.
Blitz Surf Shop stocks Ocean and Earth wetsuit repair kits, NEO-REZ and other surf maintenance essentials for DIY fixes across New Zealand. Visit Blitz Surf Shop to choose repair supplies, or contact the recommended local repairers when your suit needs specialist gluing, stitching, seam work or zip replacement.


