

As an example Leigh averages 137 days a year with very high or extreme peak UV, defined as a UV Index of 8 or more, according to Stats NZ's UV intensity monitoring. Even though the yearly average isn't stated, GIsborne experiences a lot of the year with UVI 3 or higfher, even in winter, which is when it is recommended to wear sun protection.That makes buying men's polarised sunglasses in NZ more than a choice about glare or style. The useful question is whether your pair protects your eyes, stays in place and gives you a clear view of the beach or road.
By polarised sunglasses online
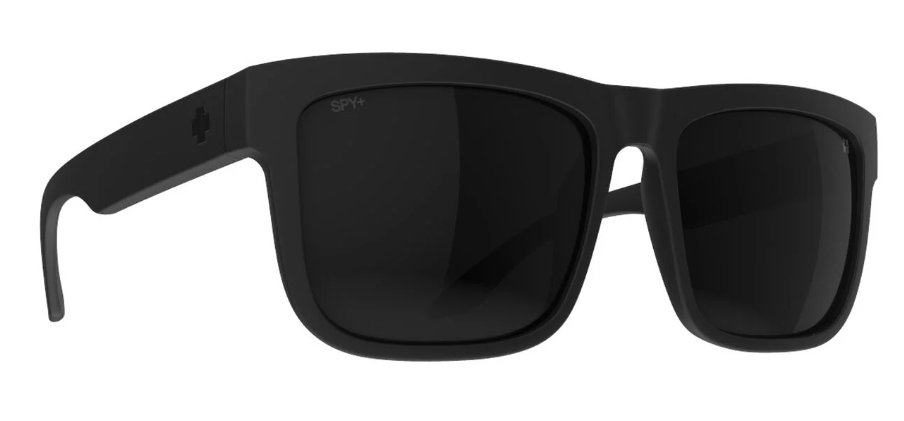
Glare Control Versus UV Protection in NZ Sun
New Zealand's UV exposure isn't confined to hot afternoons on northern beaches. The same national monitoring records very high or extreme UV across regions, including southern locations where the air can feel cool. Temperature isn't a reliable guide to whether your eyes need protection.
The wider health context matters. The Ministry for the Environment identified an increase in the age-standardised melanoma rate among New Zealand males between 1996 and 2013, as reported by Environmental Health Intelligence New Zealand. Melanoma statistics don't measure eye damage, but they reinforce why an outdoor lifestyle needs deliberate sun protection rather than a pair chosen only for appearance.
For eyes specifically, excessive UV exposure is associated with cataracts, macular degeneration, pterygium and pinguecula, as explained in SunSmart's UV and sun protection facts. A comfortable view through dark lenses doesn't tell you how much ultraviolet radiation those lenses block.
What polarisation actually does
Polarisation reduces reflected glare. UV protection limits ultraviolet transmission. They're separate functions, even when a good pair provides both.
Sunlight reflected from water and roads can create a bright, distracting sheen. A polarising filter suppresses much of that reflected light, making the scene more comfortable to look at. On the coast, that can make surface detail easier to pick out without so much squinting.
Polarised and non-polarised sunglasses compared for NZ use
| Criterion | Polarised lenses | Non-polarised lenses |
|---|---|---|
| Reduces reflected glare from water and roads | Strong reduction | Tint or coatings can reduce brightness, but don't provide the same selective glare filtering |
| Provides UV protection | Only when separately labelled as UV protective and compliant with the applicable sunglasses standard | Yes, when labelled as UV protective and compliant with the applicable sunglasses standard |
| Screen readability | Can dim LCD dashboards and some phone screens | No polarisation-related screen dimming |
| Driving suitability | Good glare control; check tint density and colour | Check tint density and colour |
A tinted non-polarised lens reduces the overall brightness reaching your eyes. That can feel comfortable, but it won't necessarily remove the harsh reflection sitting across a wet road or the water's surface. Polarisation is what makes the difference.
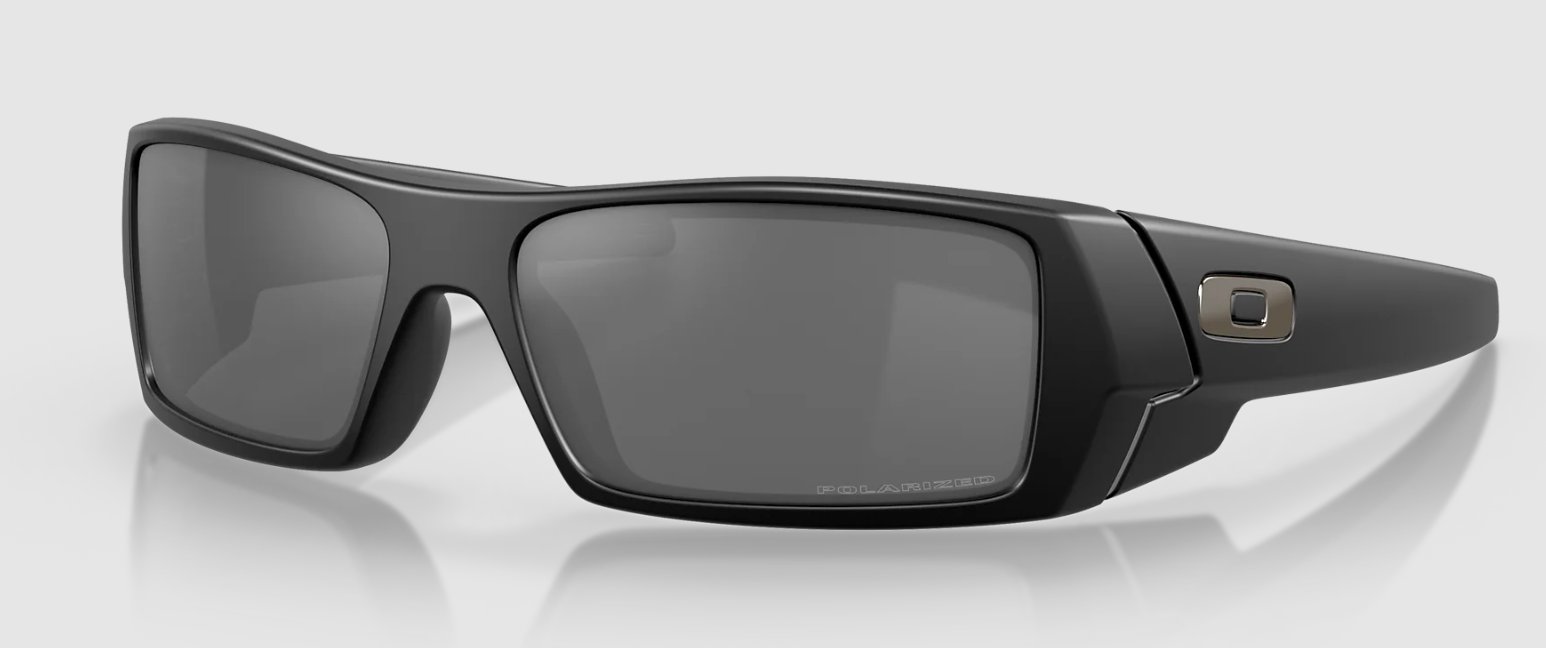
The trade-off becomes apparent when you look at certain screens. Tilt your head while checking a phone or dashboard through polarised lenses and the display may darken. Test the screens you use before deciding that a particular lens is the right everyday choice.
Why comfort can give false reassurance
Say you spend a long beach day at Wainui wearing a dark, polarised pair with no clear UV statement. The view may feel comfortable throughout, but you haven't established whether the lenses provide suitable UV protection. Reduced squinting isn't a test of ultraviolet performance.
An absent label doesn't prove a lens blocks no UV. It means you don't have the information needed to trust it. That distinction matters when a seller leans heavily on terms such as premium, performance or polarised without explaining the protective specification.
All of the sunglasses that we stock at Blitz provide proper UV protection whether they are polarised or not. Shop sunglasses at Blitz with confidence.
A certified, well-fitting non-polarised pair can be the better protective purchase than an expensive polarised pair with uncertain UV performance. You may accept more reflected glare, but you're not guessing about the primary protective function. Add polarisation once the basic protection is established.
Fit also affects the result. Light can enter around a narrow frame even when the lenses themselves are protective. A close-fitting design with useful side coverage is a more sensible coastal choice than a small fashion frame that leaves your eyes exposed around the edges.
Think of sunglasses as part of your sun-protection kit alongside a hat, shade and sunscreen, not a replacement for them. Before shopping for another pair, inspect the one you already own: find its UV statement, check the packaging if you still have it, and identify what you can verify.
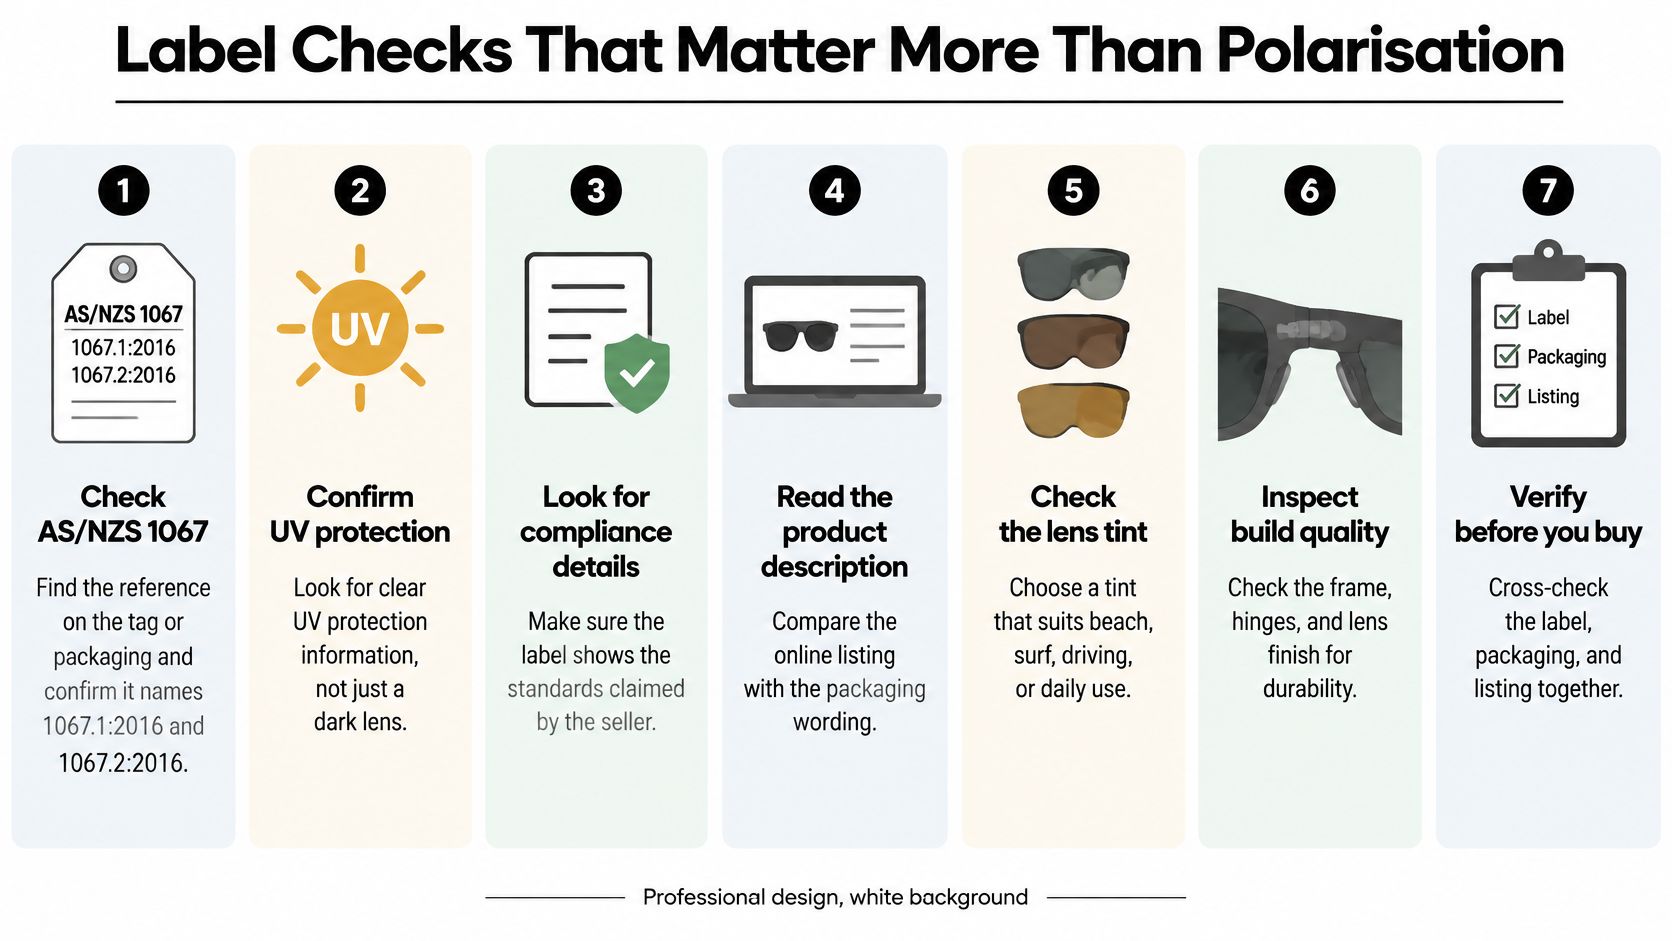
Label Checks That Matter More Than Polarisation
Start with the tag and packaging, not the mirror. WorkSafe advises UV protection when the UV Index is 3 or above, and identifies photokeratitis and photoconjunctivitis among the eye injuries UV radiation can cause in its guidance on protecting workers from solar UV radiation.
A dark lens doesn't establish suitability for outdoor work, beach use or driving. You need a protective specification and a lens that leaves enough visible light for the task.
The checks to make before paying
- Find the standard reference: Look for AS/NZS 1067 on the tag or packaging and ask whether the compliance information identifies AS/NZS 1067.1:2016 and 1067.2:2016, the separate product and test references discussed by Standards New Zealand.
- Confirm UVA and UVB protection: Look for a clear statement covering both, because the word polarised describes a different lens function.
- Read the lens category and warnings: Choose a general-purpose outdoor category for beach use and reject any lens marked unsuitable for driving if you'll wear it behind the wheel.
- Find the separate polarised claim: Check that the actual lens option you're buying is described as polarised, rather than assuming every version of a frame has it.
- Inspect coverage: Choose close-fitting or wraparound coverage that limits exposed space beside the eyes.
- Check contact points: The bridge shouldn't pinch, the temples shouldn't squeeze, and your lashes shouldn't brush the lenses.
- Account for prescription needs: If you need vision correction, choose an appropriate prescription solution rather than expecting a glare filter to sharpen an uncorrected view.
Use this visual checklist while comparing the listing with the packaging.
Lens Colours for Water, Surf and Driving
| Lens colour | Best for | Trade-off |
|---|---|---|
| Grey | Bright beach and water, natural colour | Can be too dark at dusk |
| Brown or amber | Contrast on water and overcast days | Shifts colours slightly |
| Green | Balanced tint for mixed conditions | Slight colour change |
| Pink, blue or green | Selected low-light or fashion uses, provided the tint is light enough | Can make red traffic lights harder to distinguish, so avoid for driving |
| Mirrored coating | Very bright sun and reflective brightness | Often paired with dark lenses; check the lens category before driving |
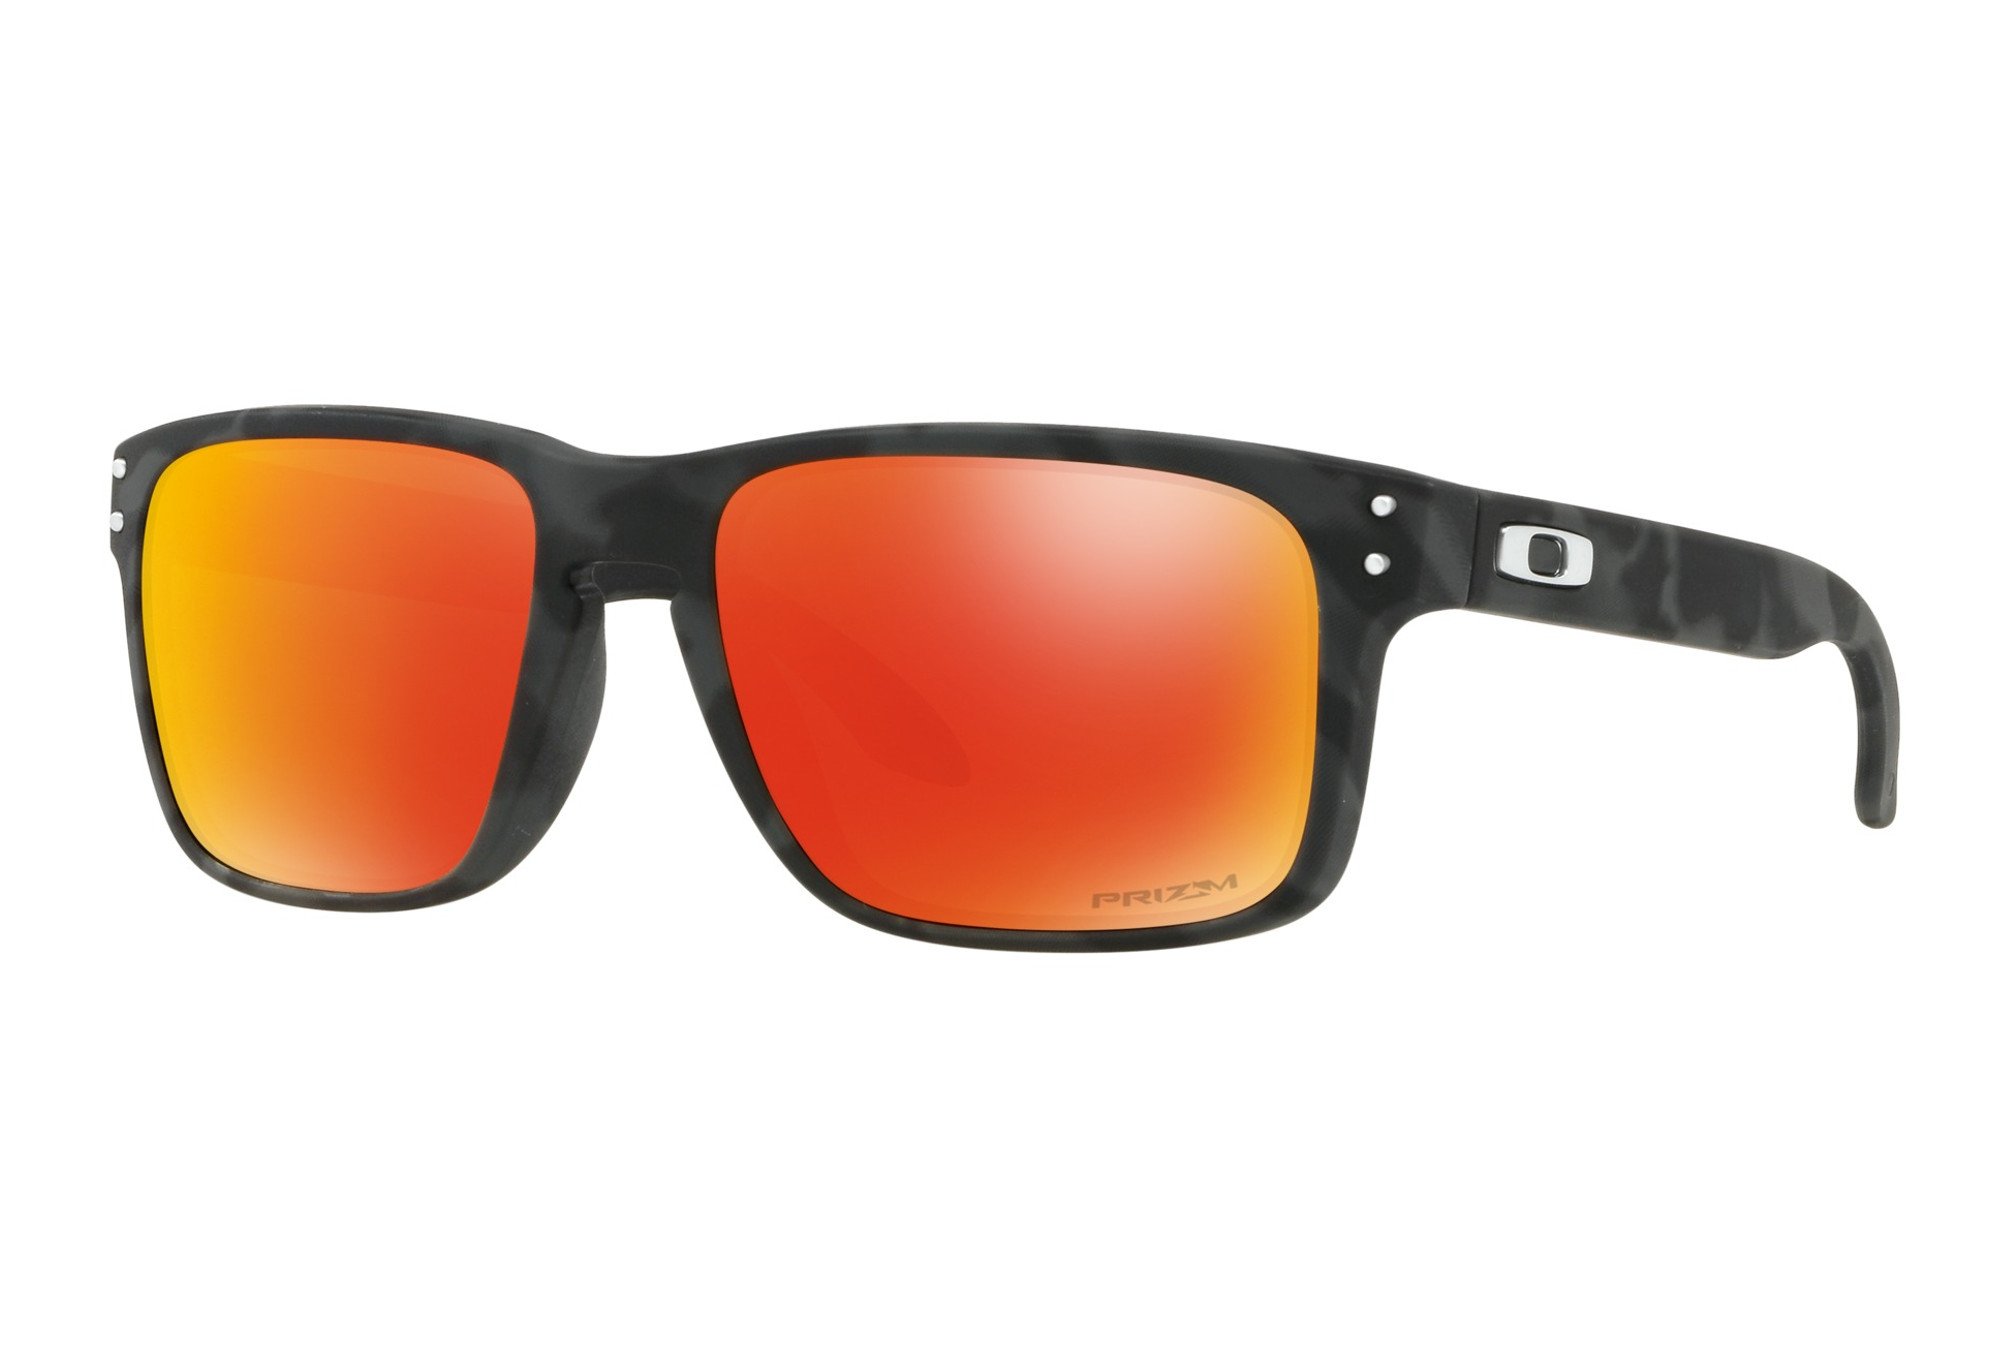
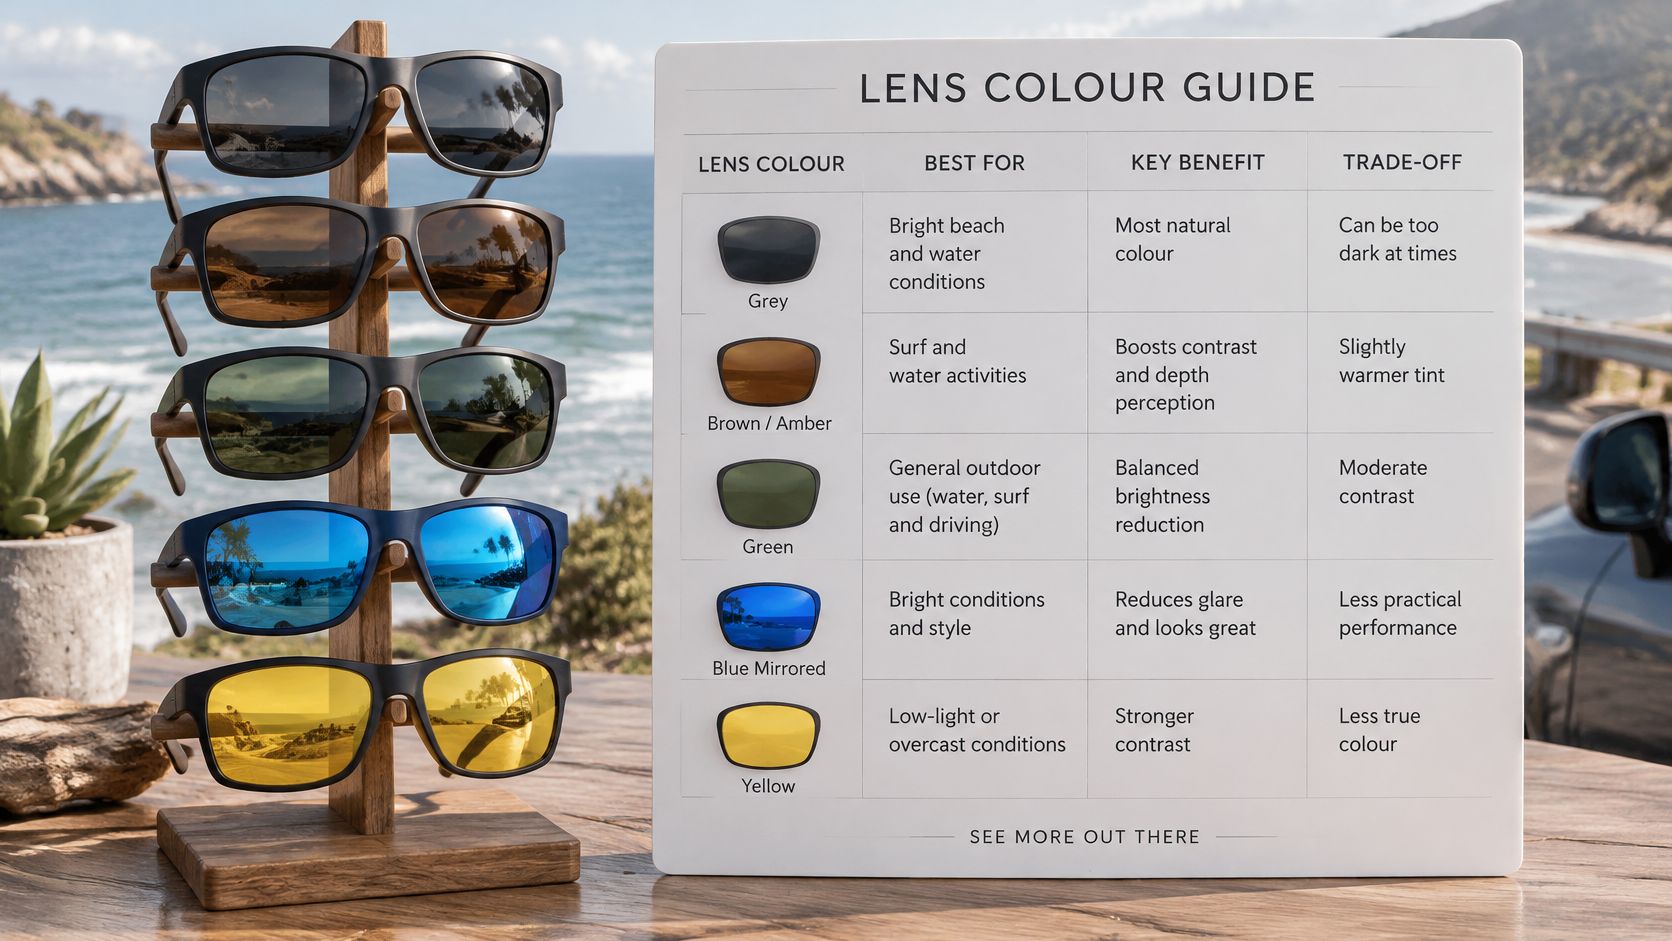
The colour you see on the outside isn't always the tint you look through. This display gives a useful starting point for separating appearance from viewing colour.
Choose the view you need
Grey is the straightforward bright-beach option. It keeps colours broadly natural, which suits walking the shoreline, checking conditions and spending time beside open water. Choose the darkness for the conditions, not because the darkest sample feels impressive indoors.
Brown and amber add a warmer view and can make contrast more useful when reading water texture, wave lines or changes around a sandbar. You'll notice a colour shift, so compare the view through each lens rather than judging the frame alone. Neither tint lets you reliably identify every underwater hazard.
Green can feel balanced for everyday outdoor use, but that doesn't make every green lens a sensible driving lens. Driven Car Guide's sunglasses advice warns that pink, blue and green tints can make red traffic lights harder to distinguish. For the car, I'd start with a neutral grey or suitable brown lens and confirm its driving designation.
Check darkness separately from colour
A mirrored finish reflects some incoming light, but it doesn't tell you the underlying tint or how much light reaches your eyes. A blue-looking mirror may sit over a different base colour. Read the lens details before treating the finish as a performance specification.
The same care applies to specialised contrast lenses. Our Oakley Prizm lens guide helps distinguish activity-focused lens choices, but the exact option still needs to match your use.
Use the accompanying video as another visual reference while comparing lens options.
Consider a beach walk that continues into dusk. A very dark lens that felt comfortable in open afternoon sun can make kerbs, shaded steps and wave detail harder to see as the light drops. Carry a lighter pair if your day regularly spans those conditions, or remove sunglasses when they prevent a clear view.
Frame and Lens Matches for Surf, Beach and Driving
A frame that looks right standing still can become irritating once you're looking down, turning your head or walking into wind. Match the frame to how you'll move, then choose the lens option. A familiar model name alone won't tell you whether the bridge, temple length and side coverage suit your face.
Water and shoreline use
Beach and walking: Medium-coverage frames can be a comfortable compromise between side protection and all-day wear. Check that the bridge supports the frame without concentrating pressure, then look for enough side coverage to avoid a broad exposed gap. You shouldn't need to push the frame back up every time you look at the sand.
Fishing and boating: Wraparound designs are useful when you're exposed to bright water across a wide field of view. Choose temples that hold without squeezing and inspect the side opening while turning your head. A curved front alone isn't enough if the frame still leaves a large gap beside your eyes.
Road use needs an unobstructed view
Driving: Try curved or full-rim frames with temples that don't obstruct your peripheral view. Check the bridge while seated, then look towards both mirrors and over each shoulder. Thick arms or an oversized rim can become distracting if they sit across your usual sightline.
| Situation | Practical starting point | Fit detail to prioritise |
|---|---|---|
| Exposed beach near Wainui | Grey polarised wraparound | Stable bridge and close side coverage |
| Drive to the beach | Neutral brown curved full-rim frame | Clear mirror view and comfortable seated fit |
| Boat or wharf | Polarised wraparound | Secure temples and suitable retention |
These are starting combinations, not fixed prescriptions. A wider face may need a different bridge or temple shape even when the intended activity is identical. Our Dragon sunglasses guide is useful for comparing frame and water-oriented features.
Finish with a movement test. Shake your head gently, look down as though picking up gear, then look sideways without turning your whole head. The frame should stay in place, your lashes should clear the lenses, and no edge should intrude awkwardly into your view.
Price Tiers and What Each One Buys
| Tier | Price position | What it tends to add | Check before buying |
|---|---|---|---|
| Entry | Lower end of the tested range | Basic frames; UV performance must be verified | Clear sunglasses-standard reference and UV statement |
| Mid | Middle of the tested range | Potential improvements in fit, coatings and polarisation quality | Lens category, optical clarity and side coverage |
| Premium | Upper end of the tested range | Brand, finish and potentially stronger warranty support | UV label and warranty terms; price doesn't prove protection |
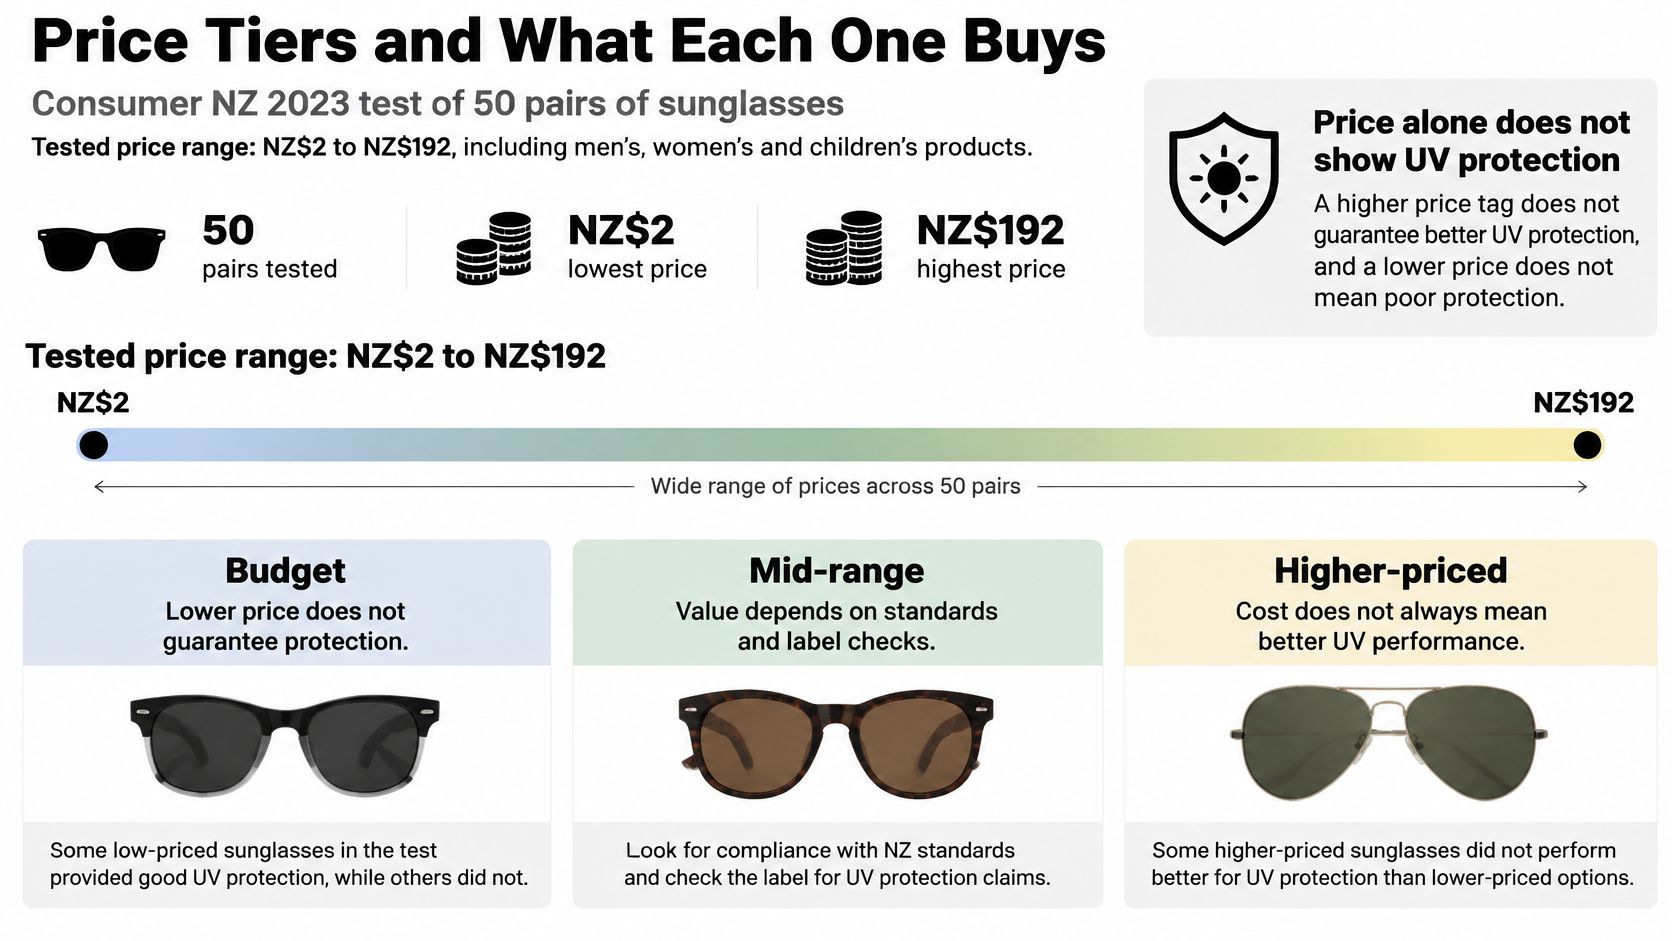
Consumer NZ tested 50 pairs priced from NZ$2 to NZ$192 in 2023, including men's, women's and children's products, according to its sunglasses testing explanation. That range is a useful reminder of how widely prices can differ, but it isn't a set of current price brackets or proof that a particular tier performs better.
The visual summary puts the tested price spread beside the checks that still matter.
Pay for an identifiable improvement
An entry-level pair can be a sensible occasional-use purchase if its protective claims are clear and it fits properly. The compromise may be simpler hinges, fewer fit options or less refined finishing. Inspect those details rather than dismissing an inexpensive pair on price alone.
In the middle of the market, look for improvements you can feel or verify. A bridge that stays comfortable, temples that hold securely, and a lens finish that suits frequent cleaning can be worth paying for. Don't assume those features come automatically with the price increase.
Premium purchases need the same scrutiny. You may value the styling, finish, replacement options or warranty, but check what's included. A logo isn't a substitute for readable specifications.
Compare the whole purchase
As a hypothetical comparison, a modestly priced wraparound with documented UV protection is a stronger protective choice than a dearer fashion frame with an unknown rating. The useful question isn't which costs more, but what the extra money changes for your day.
Ask whether you're paying for better comfort, a lens you prefer, serviceable parts or a warranty you'll use. If the answer is only appearance, that can still be a valid personal choice, provided the protective requirements are already satisfied.
Our guide to cheap sunglasses helps keep value separate from low price. Spend where you'll notice the benefit, not where the packaging makes the strongest promise.
Confirm the Label and Pick Your Pair
Choose verified UV compliance first, polarisation second, then the frame and tint for your main activity. Before keeping a new pair, complete the label checks and try it in the position you'll use it. A comfortable standing fit isn't enough if it blocks a mirror or slips when you bend towards your gear.
Are polarised sunglasses useful for fishing and driving? Often, yes, for managing glare around the coast and on the road. They're a suitable choice only when the colour, visible-light category, prescription requirements and activity-specific fit are also right.
Make the activity decide
- Surf checks and shoreline use: Start with grey or brown polarised wraparounds carrying a suitable general-outdoor category and clear protective information.
- Everyday beach wear: Grey or green polarised lenses can suit relaxed outdoor use, provided the tint remains comfortable in the conditions.
- Driving: Choose neutral grey or suitable brown, with an explicit driving-suitability statement and an unobstructed view.
- Changing light: Keep a lighter alternative available rather than forcing a dark beach lens to work through dusk.
At Blitz Surf Shop, we carry Oakley, Spy Sunglasses, Dragon, Carve Sunglasses, CHPO Sunglasses, Liive Sunglasses and Prive Revaux. Our team offers expert advice and personalised recommendations, so you can ask us to help interpret the UV labelling and compare fit before choosing.
Keep the useful pair usable
Put sunglasses in a protective case when they're off your face rather than loose beside sandy towels or keys. Rinse away salt and grit before wiping, and follow the lens maker's cleaning instructions so you don't damage the finish.
If you prefer a leather case, Grainmark Leather's care tips for leather eyewear cases are a useful companion for looking after the case as well as its contents. Keep damp eyewear separate until it's dry.
Check the label on the pair you own today. If its protection or suitability is unclear, make your next purchase around the activity you do most, not the frame that photographs best.
We offer sunglasses across a range of brands, with personalised advice to help you compare UV labelling, lens options and fit. Visit Blitz Surf Shop and tell us whether you're buying for beach days, water glare or the drive, so we can help you choose a suitable pair.


